Over the years of teaching diverse student groups, I’ve learned how to make my PowerPoint presentations more accessible. Usually, I’m learning directly from my students who have auditory or visual impairments about what works best for them. And I’m so thankful when they teach me how to better teach them.
Today I want to cover just a few of the things I’ve learned across the years. It’s not as difficult as you might think. With just a few simple steps, you can make your PowerPoint designs more accessible for those in your audience who have disabilities.
Design for Screen Readers
One of the main things to keep in mind when creating accessible PowerPoint designs is how people who are blind or have limited vision use screen reading technology to access slides. Think about having to process the information from your PowerPoint presentation if you couldn’t see any of it. How you label and order the information you are sharing matters greatly to someone who uses a screen reader. The two changes below can easily and quickly be made from the Accessibility ribbon in PowerPoint.
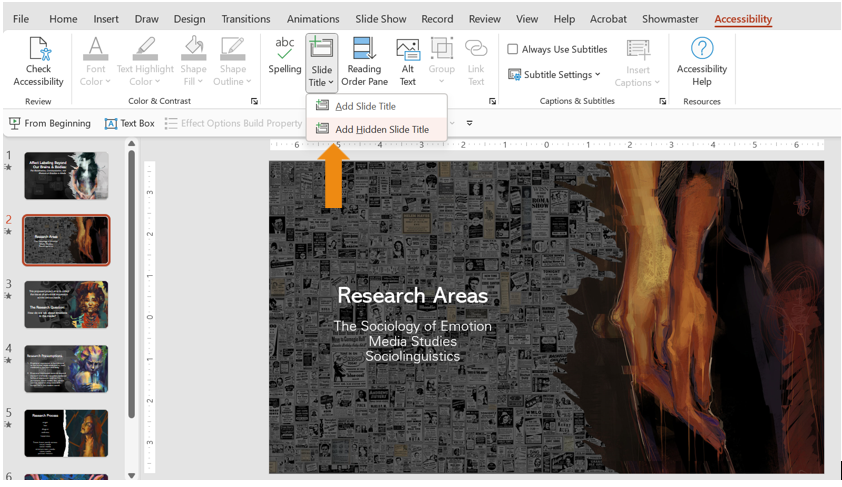
1. Title Your Slides
I never understood how important titles and headings were until I learned how screen reader users navigate content. The Axess Lab says, “the majority of the respondents to WEB Aim’s Screen Reader User Survey say that jumping between headings is their primary way to navigate.” But how do you title your PowerPoint slides?
Microsoft has great instructions on titling a slide. But here’s a quick overview. Start by clicking on the Review tab to open the Accessibility Ribbon. Here you’ll see the option to add a hidden slide title. This means the title won’t be shown on the screen, but screen readers will access it to help users navigate between the slides.
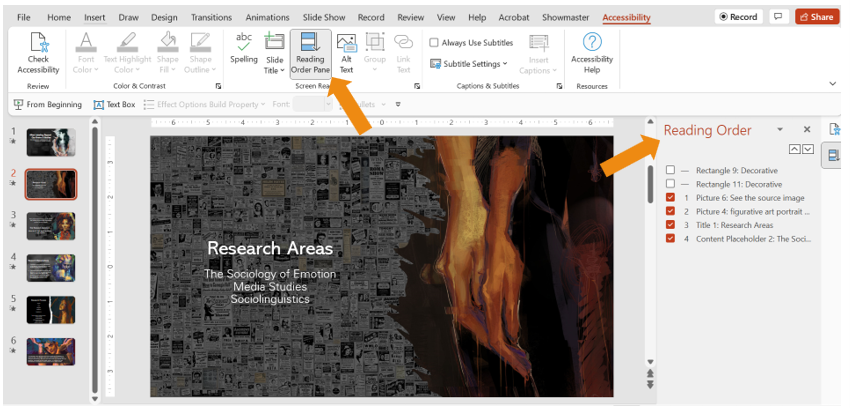
2. Order Your Elements Correctly
Designers don’t lay out visual items on a screen the way writers put words in order on a page. So it can be confusing for screen reading technology to understand your intended order of elements. To clear that up, you’ll need to set this manually. It’s as easy as ordering your animation or your visual layers. Simply click on the Review tab, select Check Accessibility, and then click on Reading Order Pane. This pulls up a menu to the left where you can set the order in which you want your slide elements to be read.
Pay Attention to Your Color Palette
As Adobe says on their color accessibility page, “You might be surprised to know that Color Vision Deficiency, more commonly referred to as color blindness impacts between 3-8% of the world’s population.” So it’s a good idea to design knowing that not everyone will view your slide deck colors the way you do. Adobe is my go-to site when it comes to making conflict-free color choices. First, I’ll create a color palette on Adobe’s site using their color blind simulator.
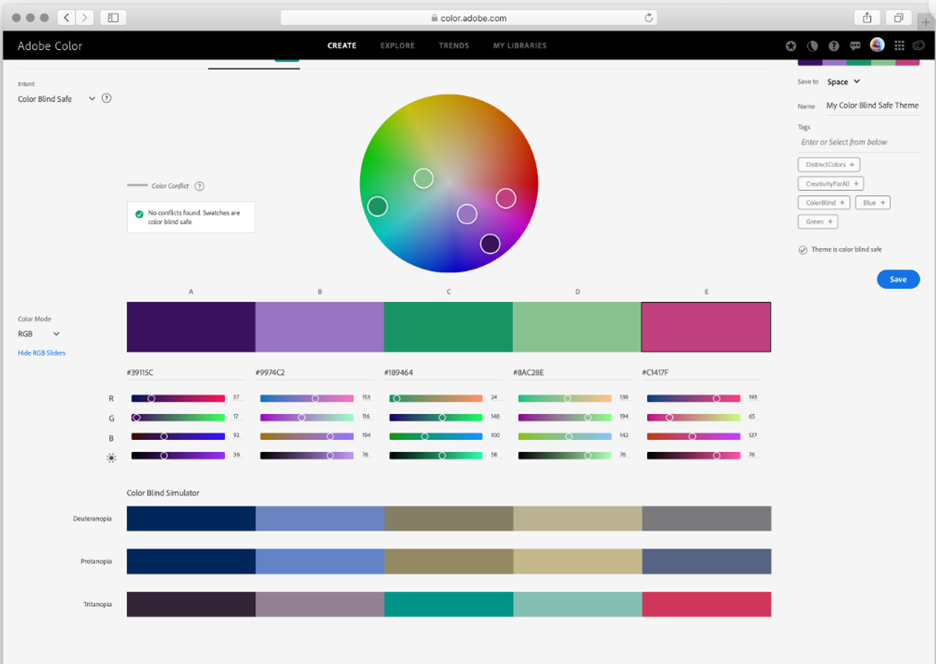 Then, I’ll import my colors into PowerPoint using their unique hex codes. Check out more information on understanding color codes here.
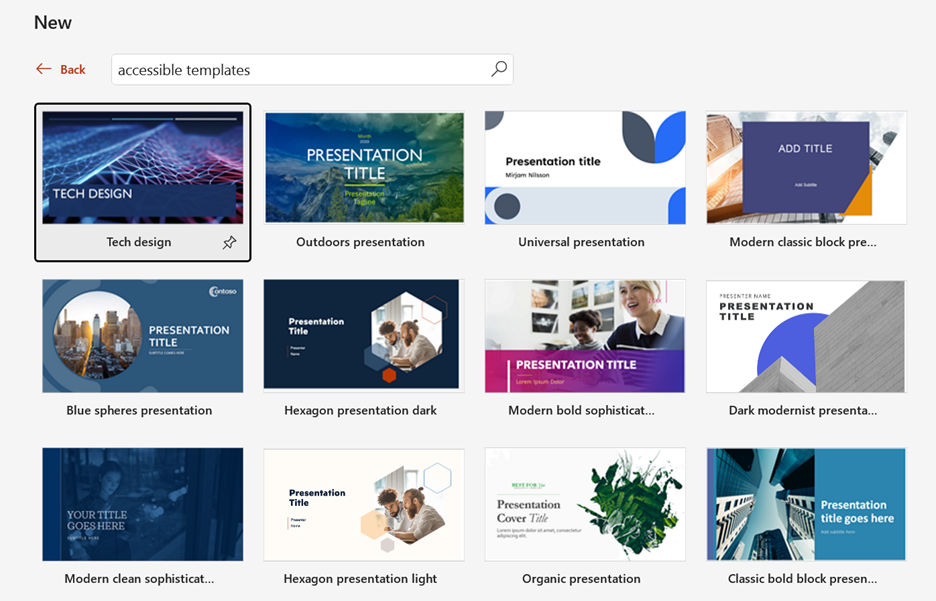
Make Use of Accessibility Templates and Checkers
You don’t have to be an expert in accessibility practices to implement them. Many presentation media programs have built-in templates and checkers. PowerPoint offers both. You really have two options. You can design with accessibility in mind from the beginning as you develop your slide deck. Or you can run an accessibility check at the end of your design process or apply it to your existing slide decks.
To use an accessible template, type “accessible template” into the search bar when creating a new PowerPoint presentation. You’ll find dozens of slide deck templates that have been designed to be accessible for all types of users.
 Or, if you’d rather design your PowerPoint and apply accessible elements afterward, you can use the accessibility checker. To access the checker, click on the Review button and then click on Check Accessibility. This brings up suggestions for making the slide more accessible, as shown below.
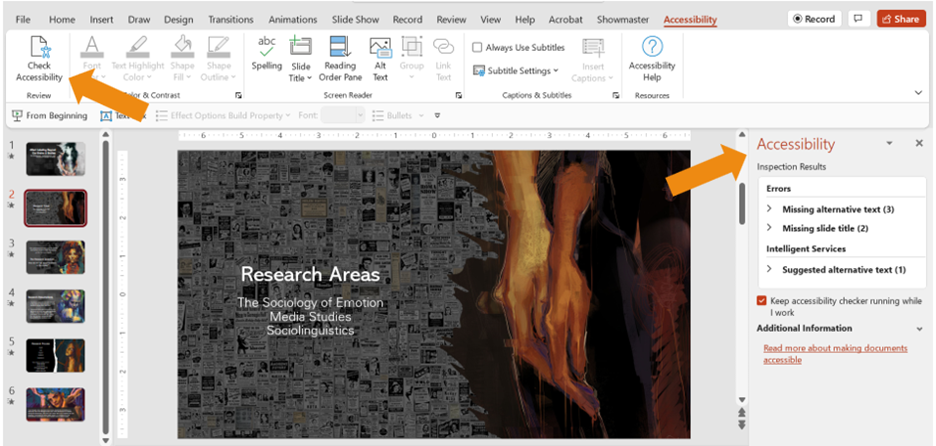 Simply expand the menu under each of the errors listed to see more information about how to correct your PowerPoint.
It doesn’t take much time to create accessible PowerPoint slides. By designing for screen readers, paying attention to your color palettes, and making use of accessibility templates and checkers, you can rest assured that your slide deck reaches and impacts everyone in your audience.
Want more ideas to take your presentation design to the next level? We can help.
