Ready to move from static, bullet-point slides to dynamic videos and animations in your PowerPoint presentation design?
On Thursday, we taught you how to create a customized video in Canva in 5 simple steps. If you missed that blog, you can check it out here. Today, we’re teaching you how to embed your MP4 videos into your PowerPoint presentation. We’ll also show you how to perfectly set up your playback controls. This way, your video will be sure to play seamlessly within your presentation.
Saving Your Video
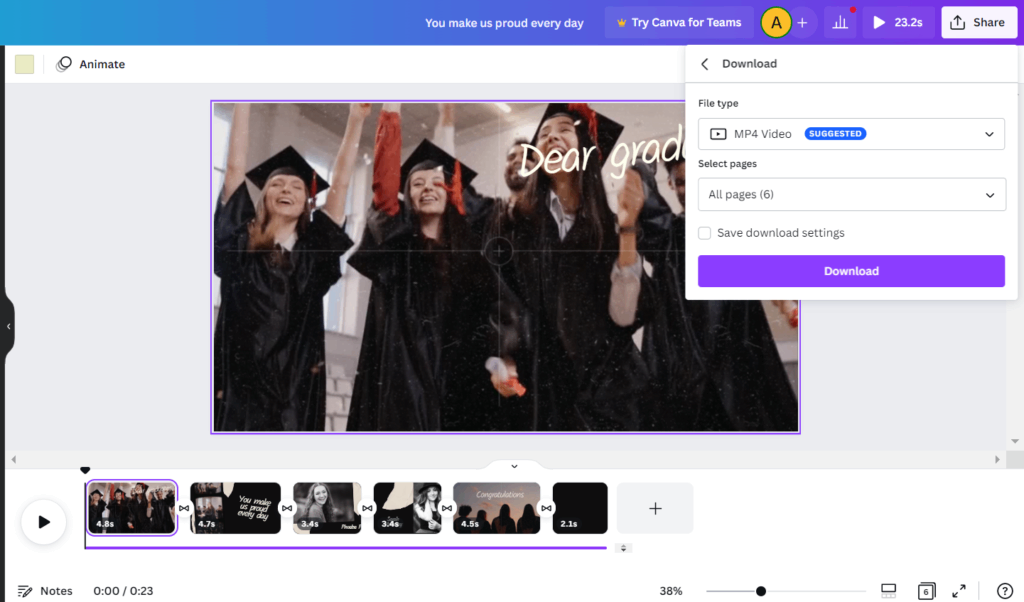
Say you’ve just finished creating your video on Canva or another video app. You’ll want to make sure you save it in MP4 format. On Canva, you simply need to click on the Share button in the top right corner, then select Download, and select MP4 as shown below.
 (Troubleshooting: Sometimes Canva saves these videos as .mp4.crdownload files. If that happens to you, simply go into the file wherever you saved it. Then, delete the .crdownload from the name and resave it.)
Putting Your Video on a PowerPoint Slide
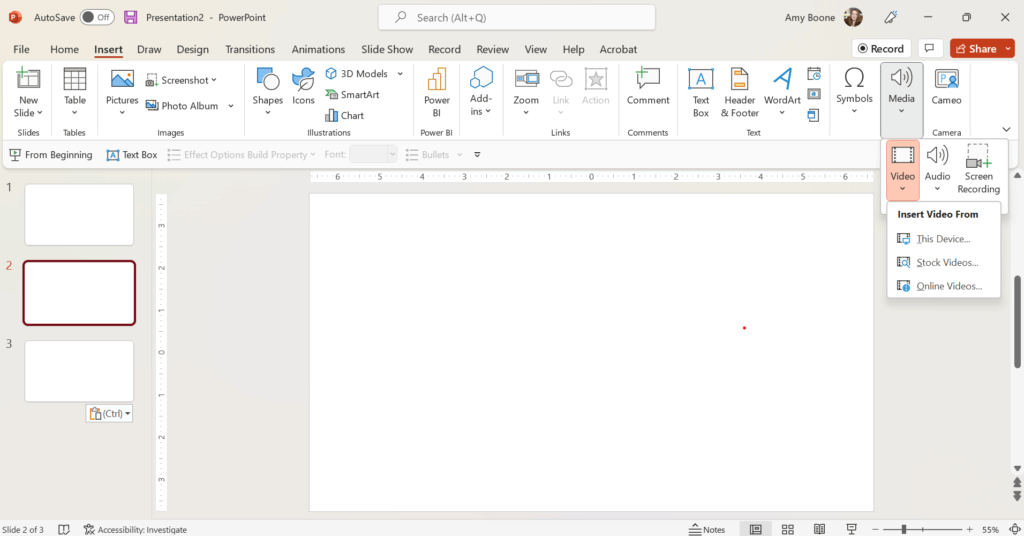
Now that you have a MP4 video file saved on your device, jump over to PowerPoint. In PowerPoint, create a blank slide in your slide deck where you’ll want your video to go. Then, click on the Insert menu and select Media, and then Video from this Device. Select your video file to embed it into your PowerPoint.
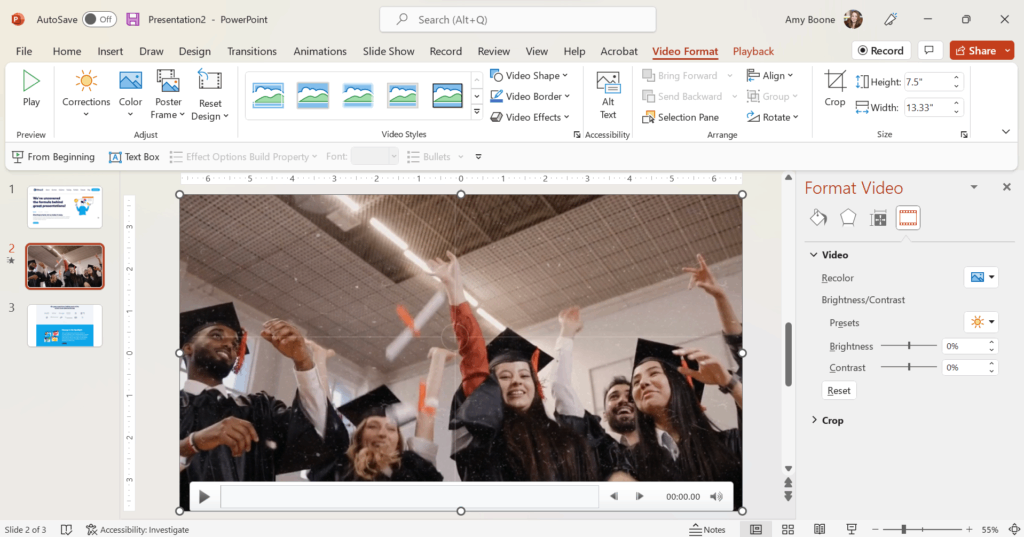
 Your video will now be on the slide that you selected. If you click on your video, you’ll notice this brings up two menus which are highlighted in orange on your top menu bar. One is called Video Format; the other is called Playback. We’ll use these in the next steps.
Resizing Your Video
The next step is resizing the video on your slide. You can adjust the size manually by dragging the video frame. Or you can go into the Video Format menu and type in the specific size specifications as shown on the top right.
 If you aren’t using a frame of some kind, you’ll probably want your video to play full screen so that it is the most visible for your audience. The easiest way to do this is to go into the Playback menu. From here, select Play Full Screen from the Video Options menu. This tells PowerPoint to adjust the video to full screen playback no matter how the video has been sized manually.

Playback Options
Now that you’ve loaded your video and resized it, it’s time to set up your playback options. In the Playback menu in the Start dropdown box you can choose between In Click Sequence, Automatically, or When Clicked On.
 Here’s a helpful chart from Microsoft which explains the differences.
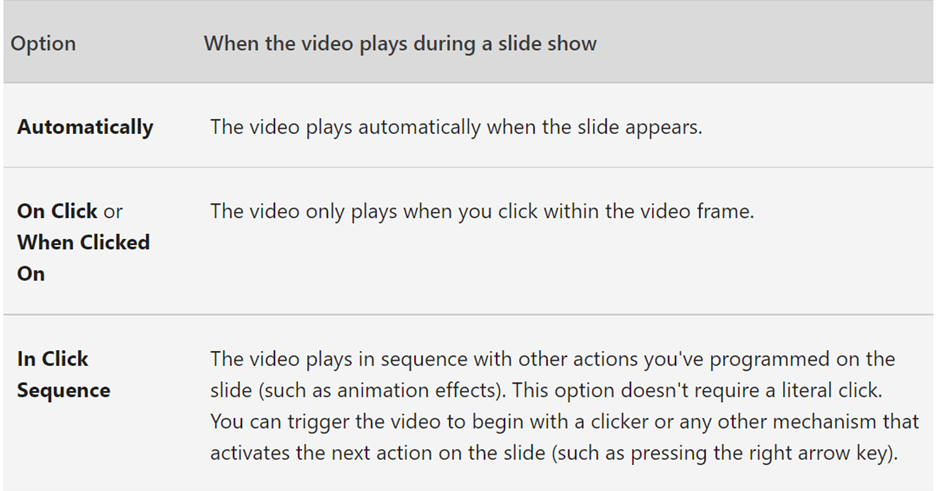 If you choose Automatically, the video will start as soon as you advance to that slide. It’s your one-click option. But if you are someone who sometimes accidentally clicks ahead of yourself and has to back track, this could present a problem. That’s why you may want to choose the When Clicked On option. This option takes two clicks to start the video (one to advance to that slide, and one to play it). But it allows you more control. If you have other animated elements on the slide, In Click Sequence will usually be best.
How to Move Past Your Video
One of the common issues presenters have is moving past the video once it’s done to continue their presentation. They might get “stuck” on the slide with the embedded video. Sometimes this happens because the video plays full screen. So the buttons to advance to the next slide aren’t easily visible.
Your best option to prevent getting stuck is to go into the Playback menu under Video Options and check the box next to Hide While Not Playing.
This means that as soon as your video finishes, it will show the blank slide onto which your video is embedded. (Keep in mind, this means you’ll want to choose your background color or texture carefully since it will be visible when the video isn’t playing.)
If you choose not to hide the video when it’s not playing, you can use the regular forward arrow to move to your next slide. If at any point you can’t see those arrows, you can always click on the right arrow to advance your presentation.
Other Considerations
Once you have your video set up, there are 3 more boxes I’d set up in PowerPoint. Two of them are found in the Video Options menu: Loop until Stopped and Rewind after Playing.
Consider whether you want your video to run on a loop or not and check the box correspondingly. Also, you’ll want to check the box next to Rewind after Playing if you see any need to play your video a second time or to go back to it at any point in your presentation. This option just tells PowerPoint to always have the video ready to play from the beginning.
One final consideration is whether you want the media controls (start, stop, pause, volume) to show on the bottom of your video. If you’ll want to be able to easily access these options while the video is playing, make sure to click on the Slide Show menu and go into the Set Up options. From there you can choose to Show Media Controls.
 Those are the basics of embedding an MP4 video into your PowerPoint presentation. By following these simple tips and double checking your video settings, you can make sure your presentation slide deck featuring dynamic video goes off without a hitch!
We love sharing tips and tricks of great presentation design. For more information about how to take your presentations to the next level, reach out to one of our presentation design experts now.
