Dynamic animation and videos are a hot trend in presentation design these days. But what if you’ve never created a presentation video before?
Today we’re going to show you how to create a customized Canva video in 5 simple steps. Then, on our next blog, we’ll show you how to embed that video into your PowerPoint presentation. Let’s get started.
Step 1: Gather The Elements for Your Presentation Video
Let’s say you are asked to give a presentation at your company’s end of the month meeting. Your boss asks you to include a short video congratulating the two recent college graduates on your team. The first thing you need to do is gather the elements you want to use in your video. That includes digital picture or video files from the graduates.
Step 2: Log Into Canva
Once you have the pictures and video files you want to use, log into Canva (it’s free!), and click on the video icon at the top of the page near the center. Once you click on videos, you can enter “graduation” in the search bar on the left to pull up graduation video templates.
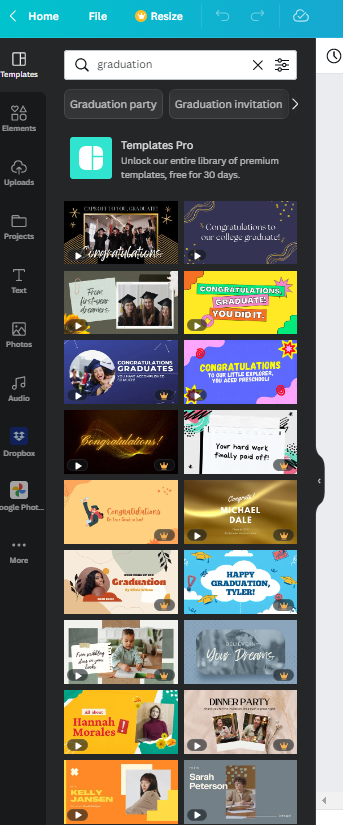 Be aware that there are two “levels” to Canva—the free account and the premium account. If the video is marked with a crown in the lower right corner, that means you’ll have to pay for some or all of the elements in that template. Pick a template to get started or you can start from scratch. I chose the “black graduation video” template for this example. Click on the template and then choose to apply all the pages to your video.
 Step 3: Customize Your Presentation Video
In this step, you’ll make the video your own, changing the elements you don’t like and incorporating the ones you gathered in the first step. For example, I want to change the template font with one that is easier to read. And I want to switch up the wording a bit. These are easy changes to make since Canva’s workspace is pretty user-friendly.
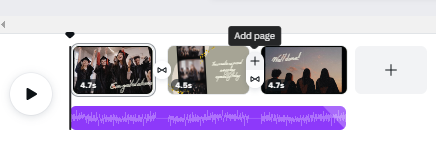
Next, I need to add the two pictures of the company graduates. In my video timeline at the bottom of the screen, I’ll click on the circle in between the pages and select “add page.” I’ll do this twice to create two separate pages, one for each graduate.
 Then, I’ll click on uploads in my left menu bar and choose to upload the files I gathered in step 1.
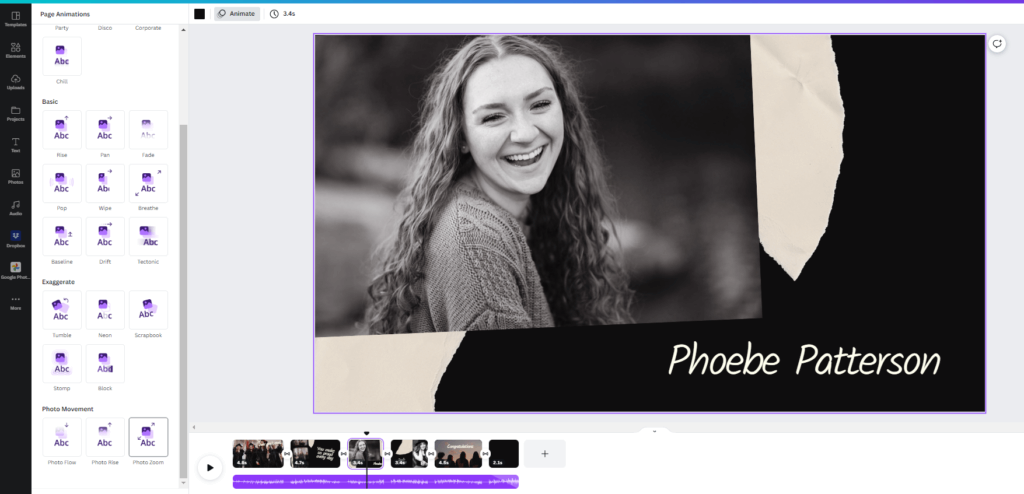
From here, I copied some of the background elements that were used in the template (the shapes that look like ripped paper) and I simply inserted the pictures in front of those. I chose to animate the photos with the “photo zoom” function in the animate menu so that there is slight movement when the pictures appear.
 You can also drag each page in the timeline to adjust the length of time it shows. Finally, add a blank, black slide at the end of your presentation video that lasts for at least 2 seconds. I’ll tell you why in the next step.
Step 4: Add Transitions
Once you have all of the pages and elements of your video in place, it’s time to make the video flow smoothly. You’ll find the transition options right below the “add page” button in between the pages. There’s no one right transition. It really depends on the template you’ve chosen and the elements you’ve used in the video. Just keep in mind that the best transitions are the ones that don’t draw too much attention to themselves. For this video, I chose the dissolve transition.
![]() You can adjust the length of the transition in the transitions menu. I like to keep all of my transition lengths the same (0.3 seconds is my go to), except for the last slide. I like a slower fade out to black after my last slide. So this is why we added the black slide in step 3. For this transition, I set it to dissolve more slowly.
You can adjust the length of the transition in the transitions menu. I like to keep all of my transition lengths the same (0.3 seconds is my go to), except for the last slide. I like a slower fade out to black after my last slide. So this is why we added the black slide in step 3. For this transition, I set it to dissolve more slowly.
Step 5: Add Music
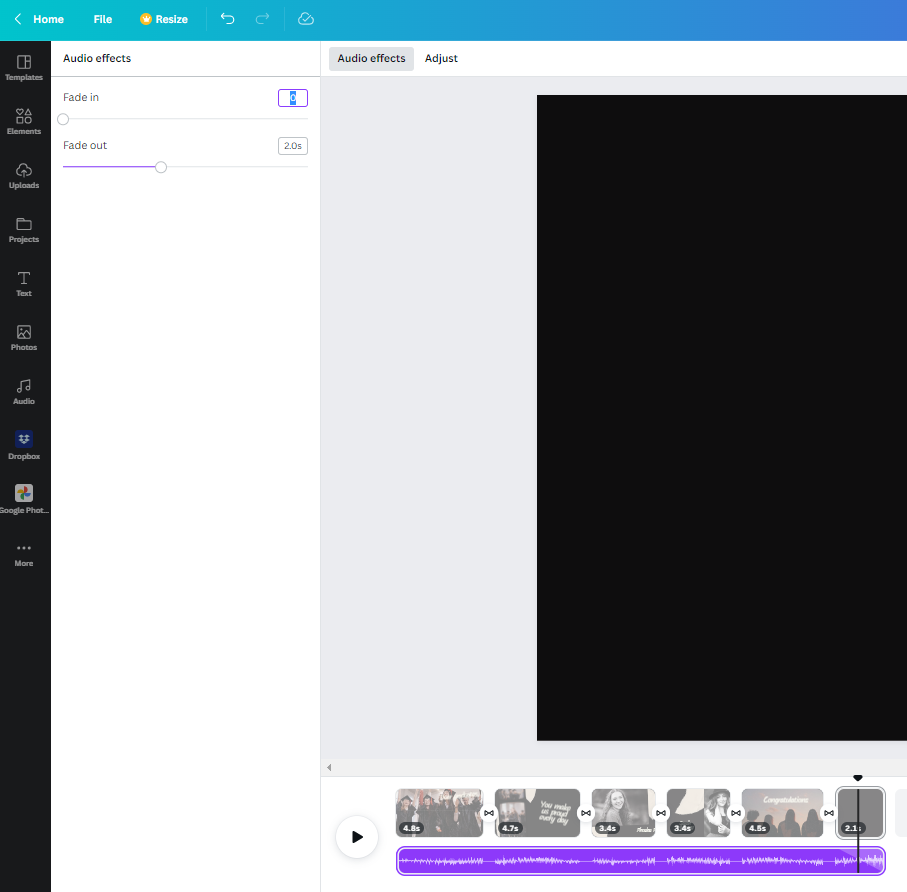
Finally, it’s time to add music. Most Canva video templates will come with audio already attached. However, it’s easy to change your audio track. You can use some of the royalty-free audio already in Canva’s library by clicking on the audio link in the left menu bar. Or you can upload free tunes from a website like Bensound.com. If your video requires you do voiceover work, you can record yourself and upload the audio file just like you did the photo files. Canva gives you the option to have multiple audio tracks, so you can include both music and voiceover narration.
The last thing you’ll want to do in this step is to drag your audio file a little bit into the blank, black slide and set it to fade out. You do this by clicking on the purple audio bar under the video timeline and then clicking “audio effects.”
 Click on the “share” button in the top right corner to save your design in the format you need.
You’ve now created a customized presentation video using both stock and personal files with Canva video (watch out Cannes film festival!). And hang tight, because on our next blog, we’re going to show you how to embed your newly created video into your PowerPoint presentation. Stay tuned.
We are passionate about dynamic presentation design. Ready to learn more?
