If you’re building a PowerPoint and trying to figuring out the best and fastest way to make curved text in your deck, you’ve come to the right place. Today we’ll walk you through a step by step guide to curve your text – no more guess work or googling needed.
Curved Text Tutorial:
- Insert text box with content
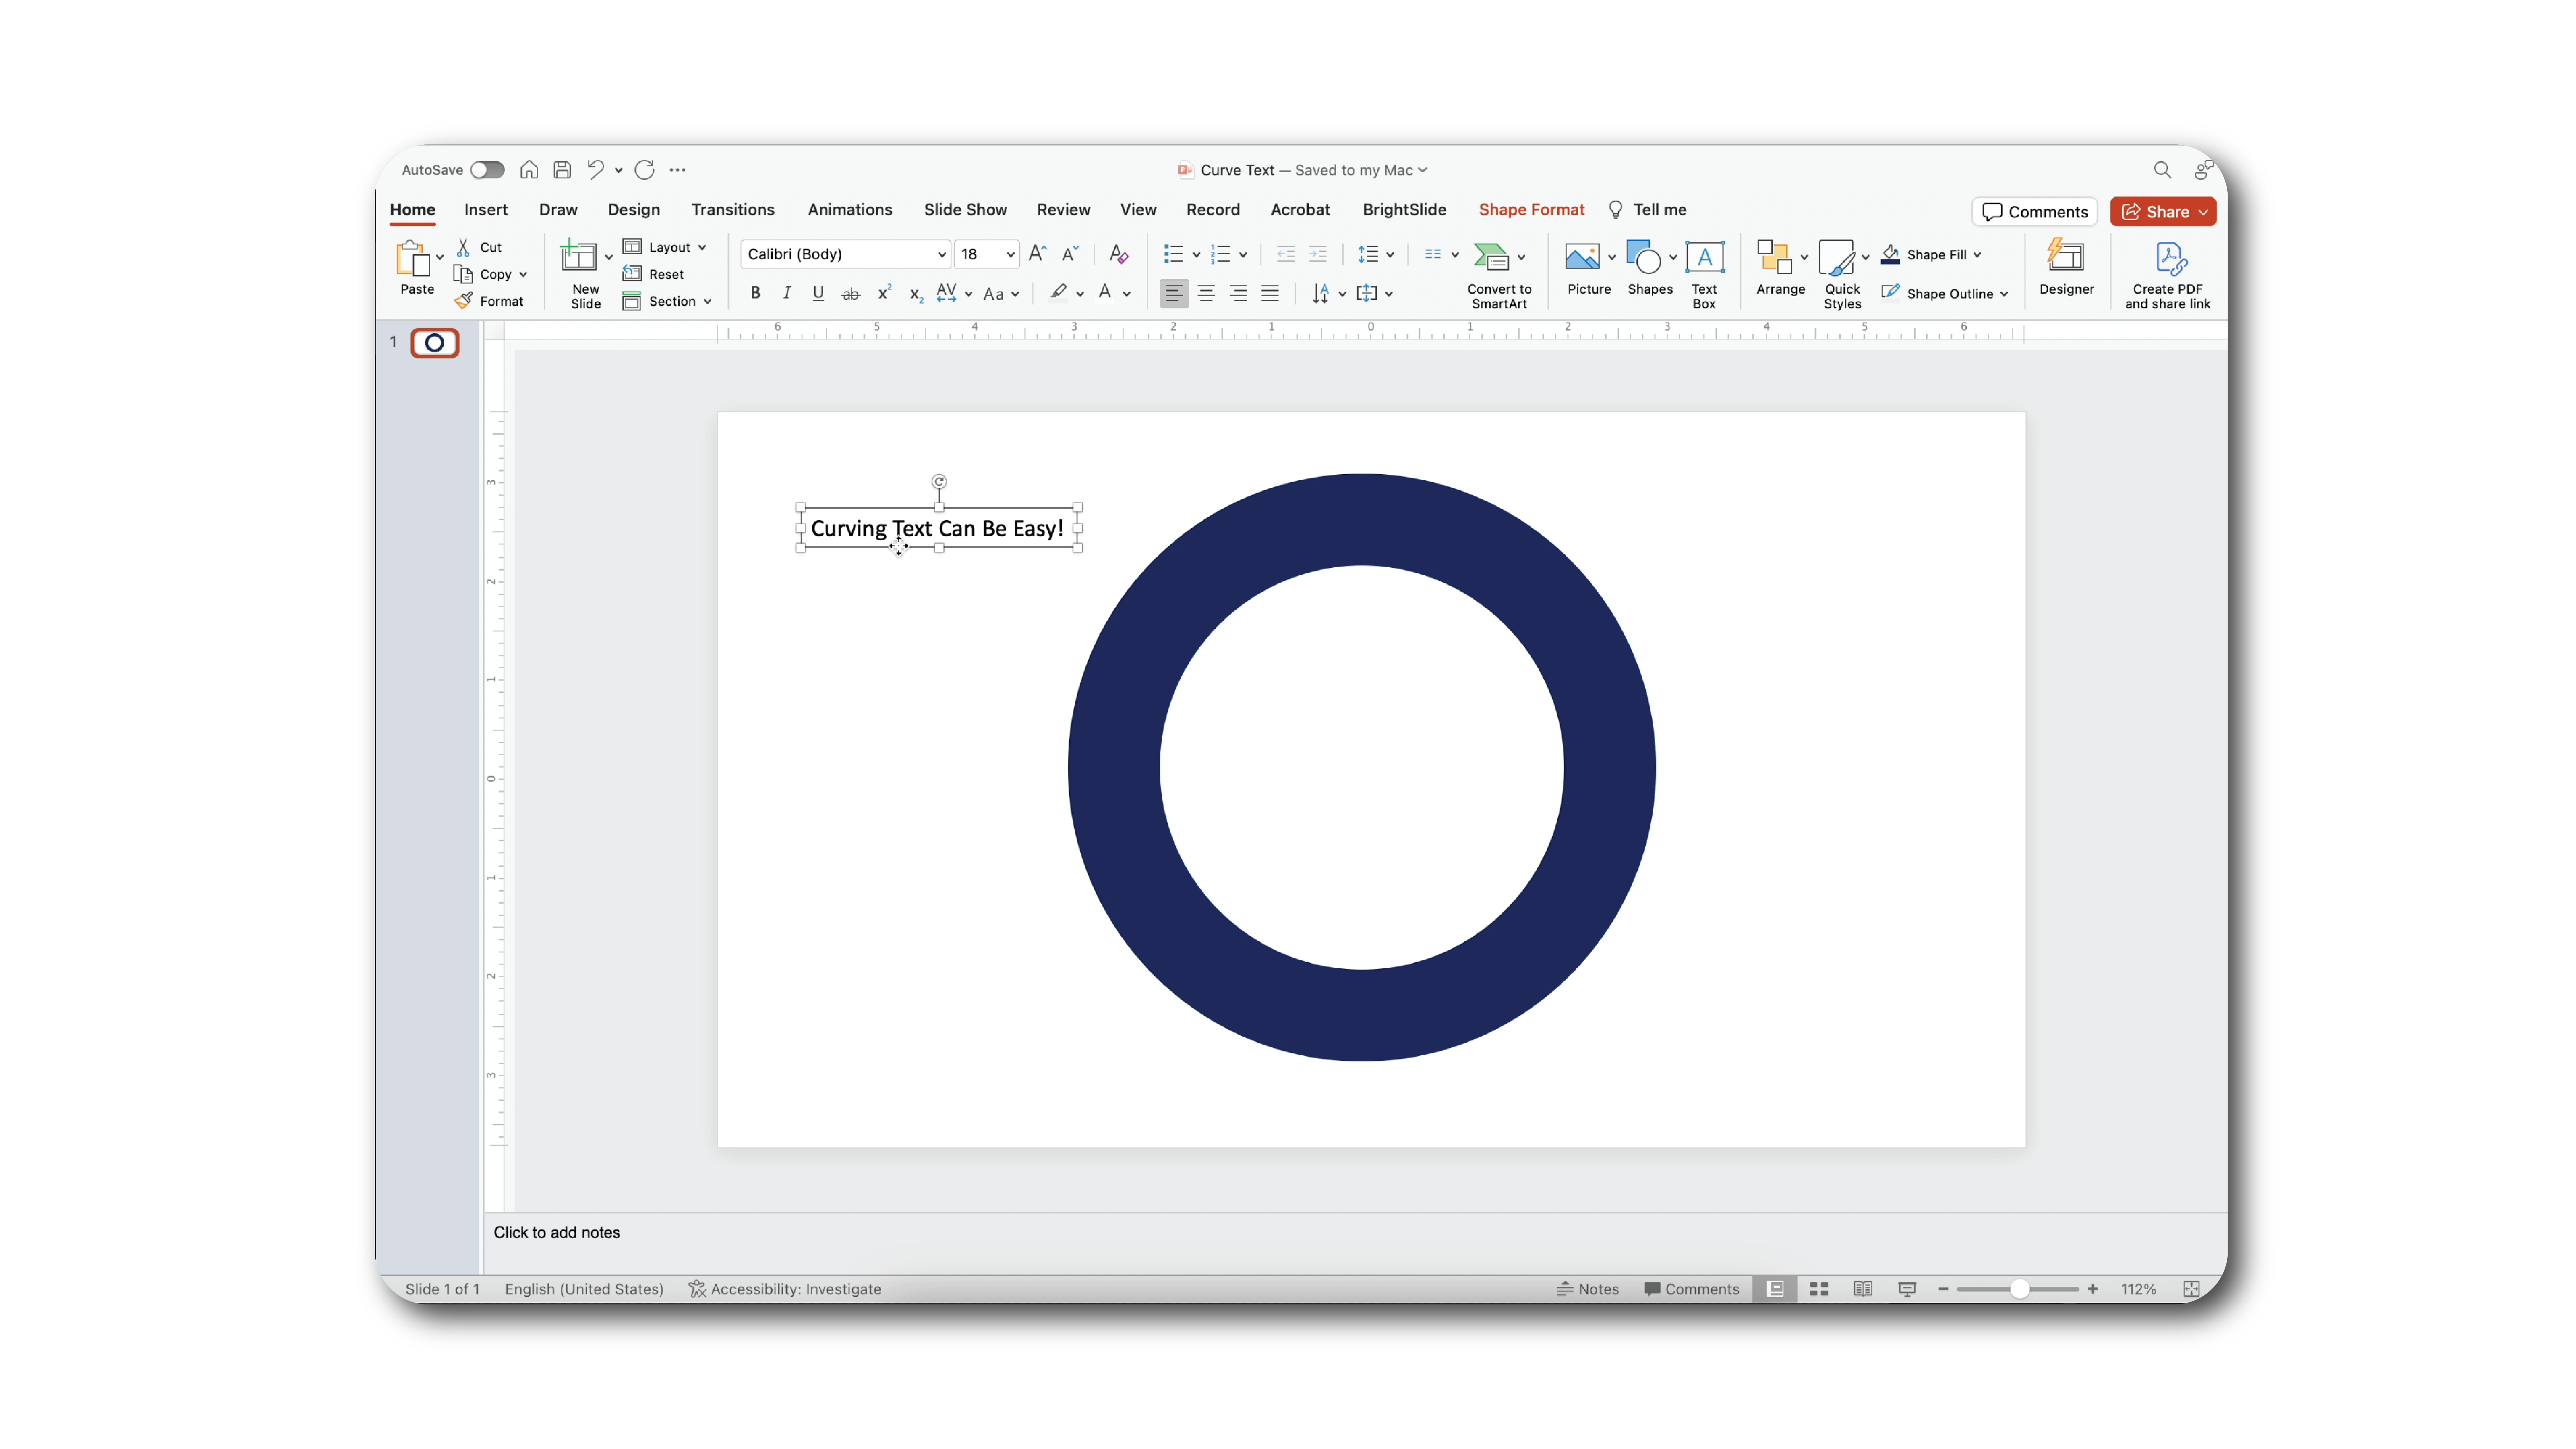
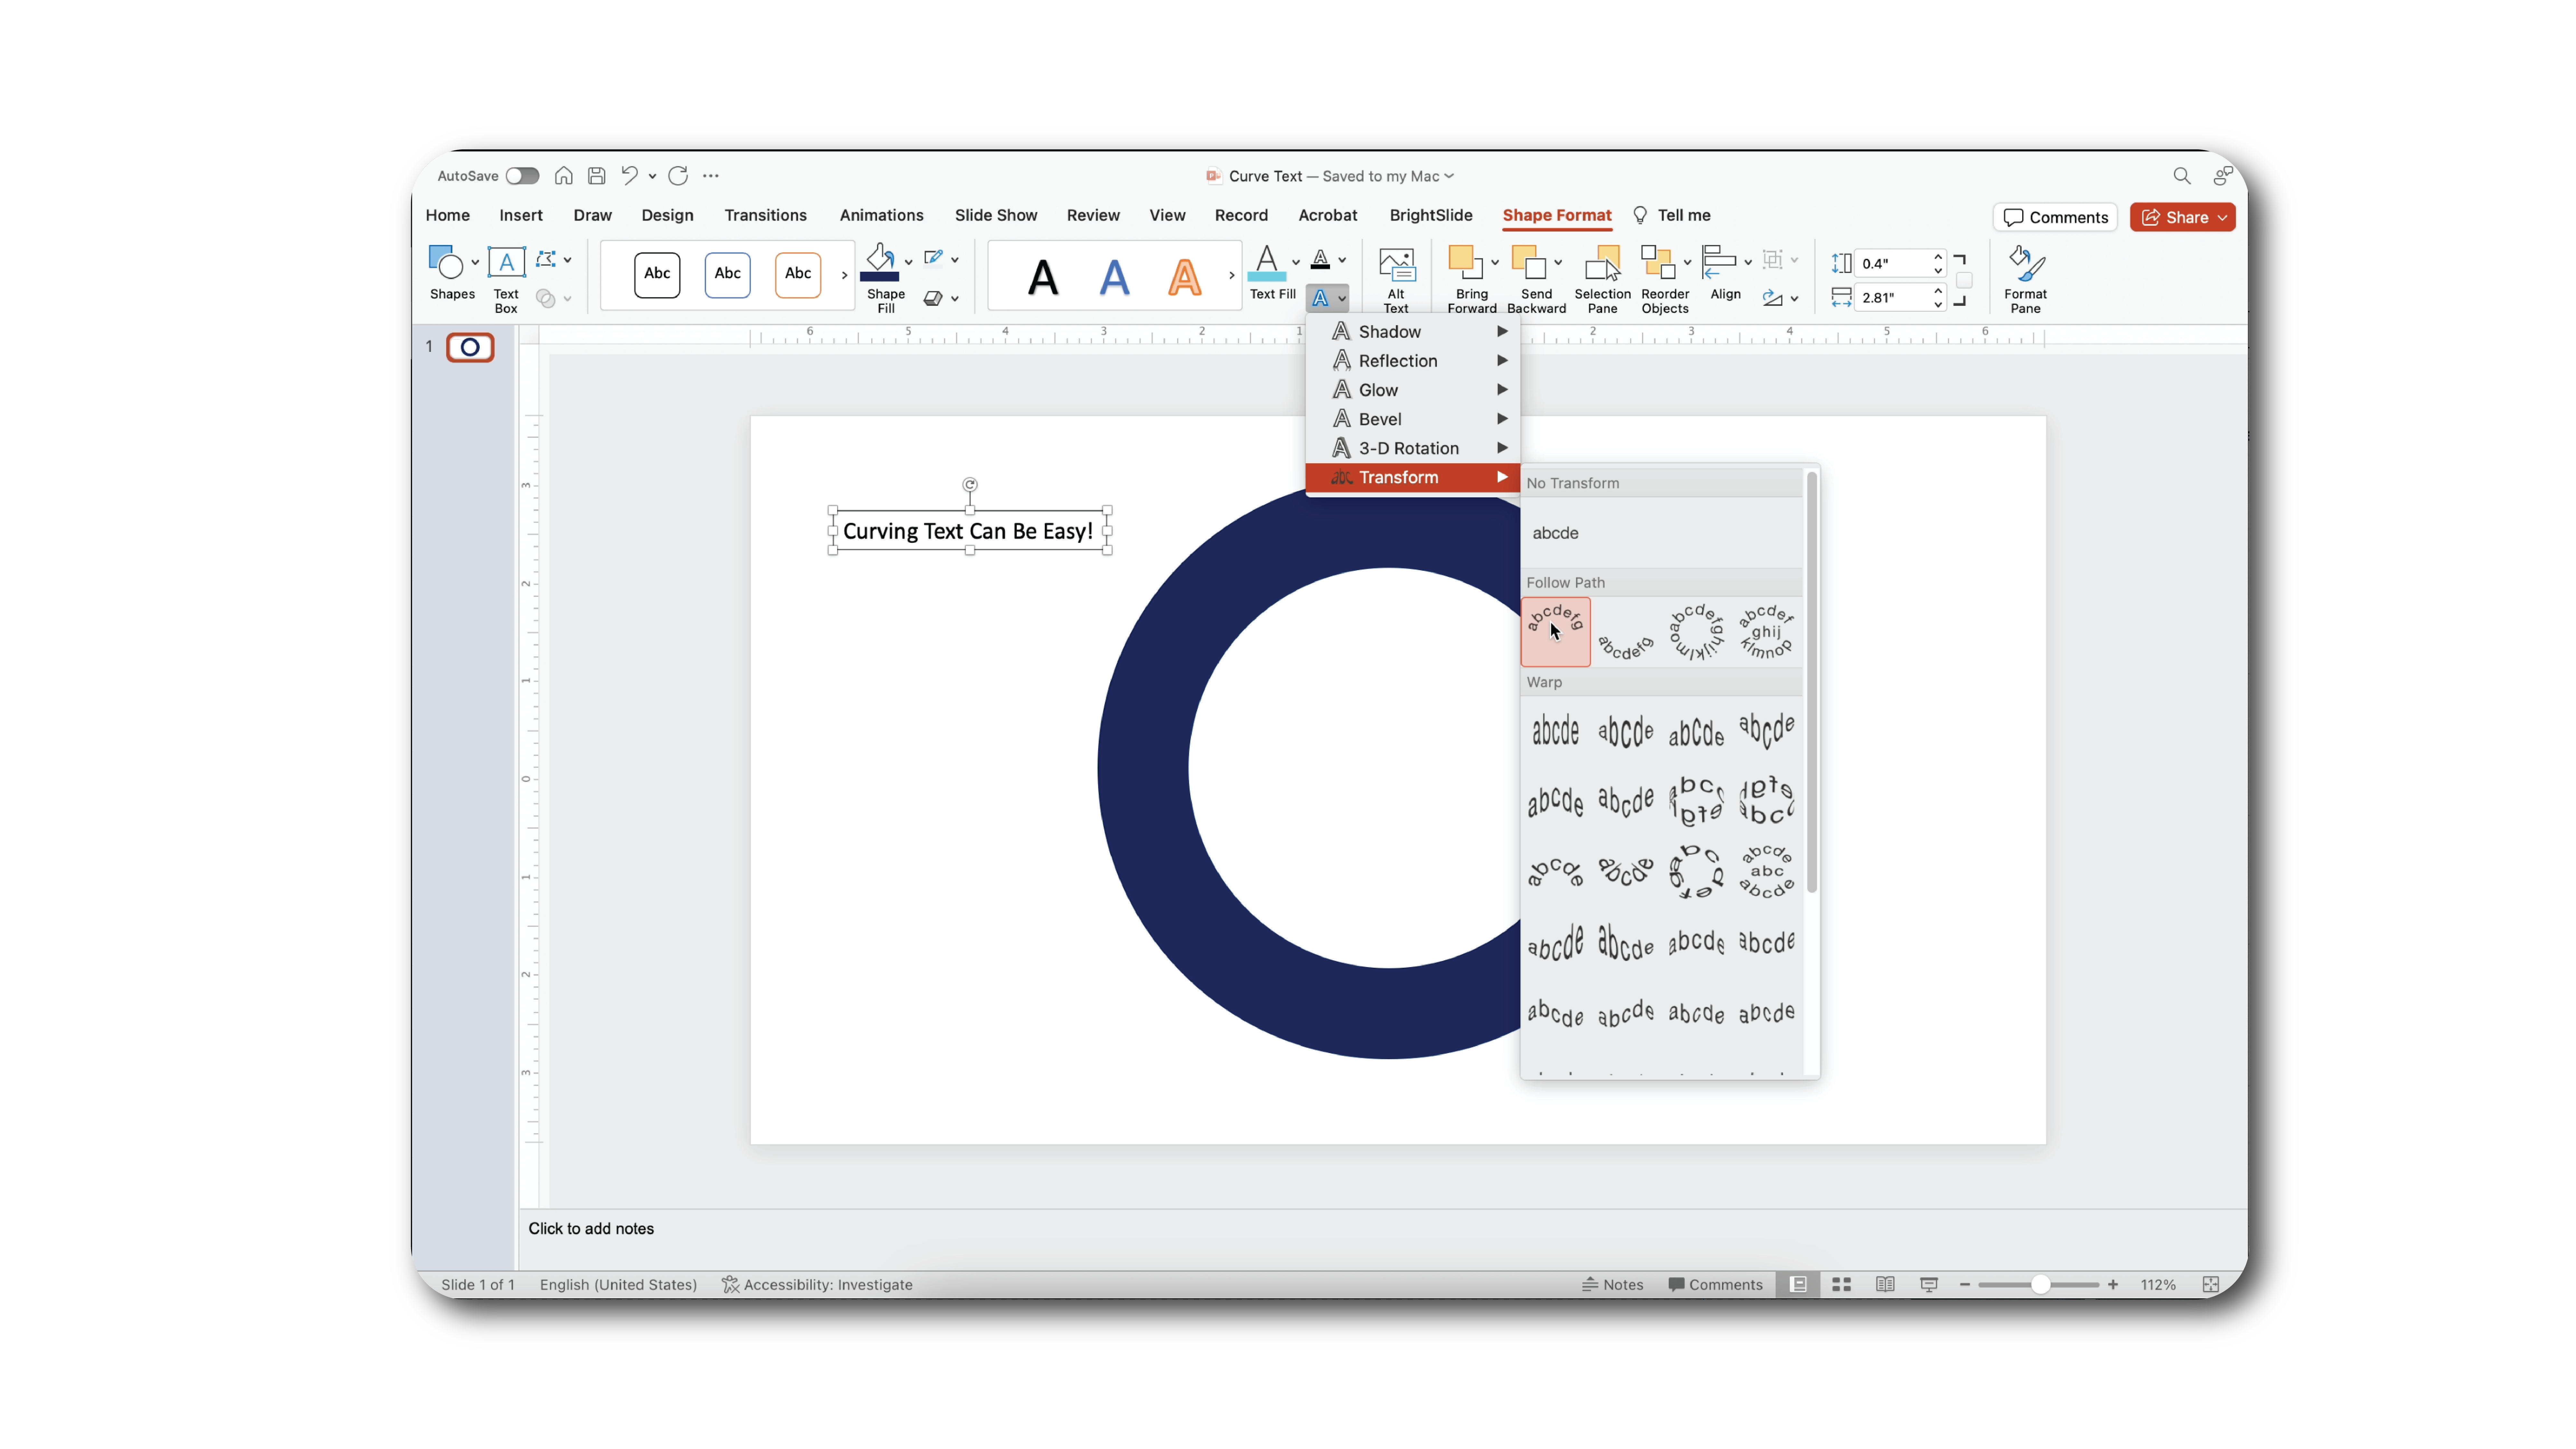
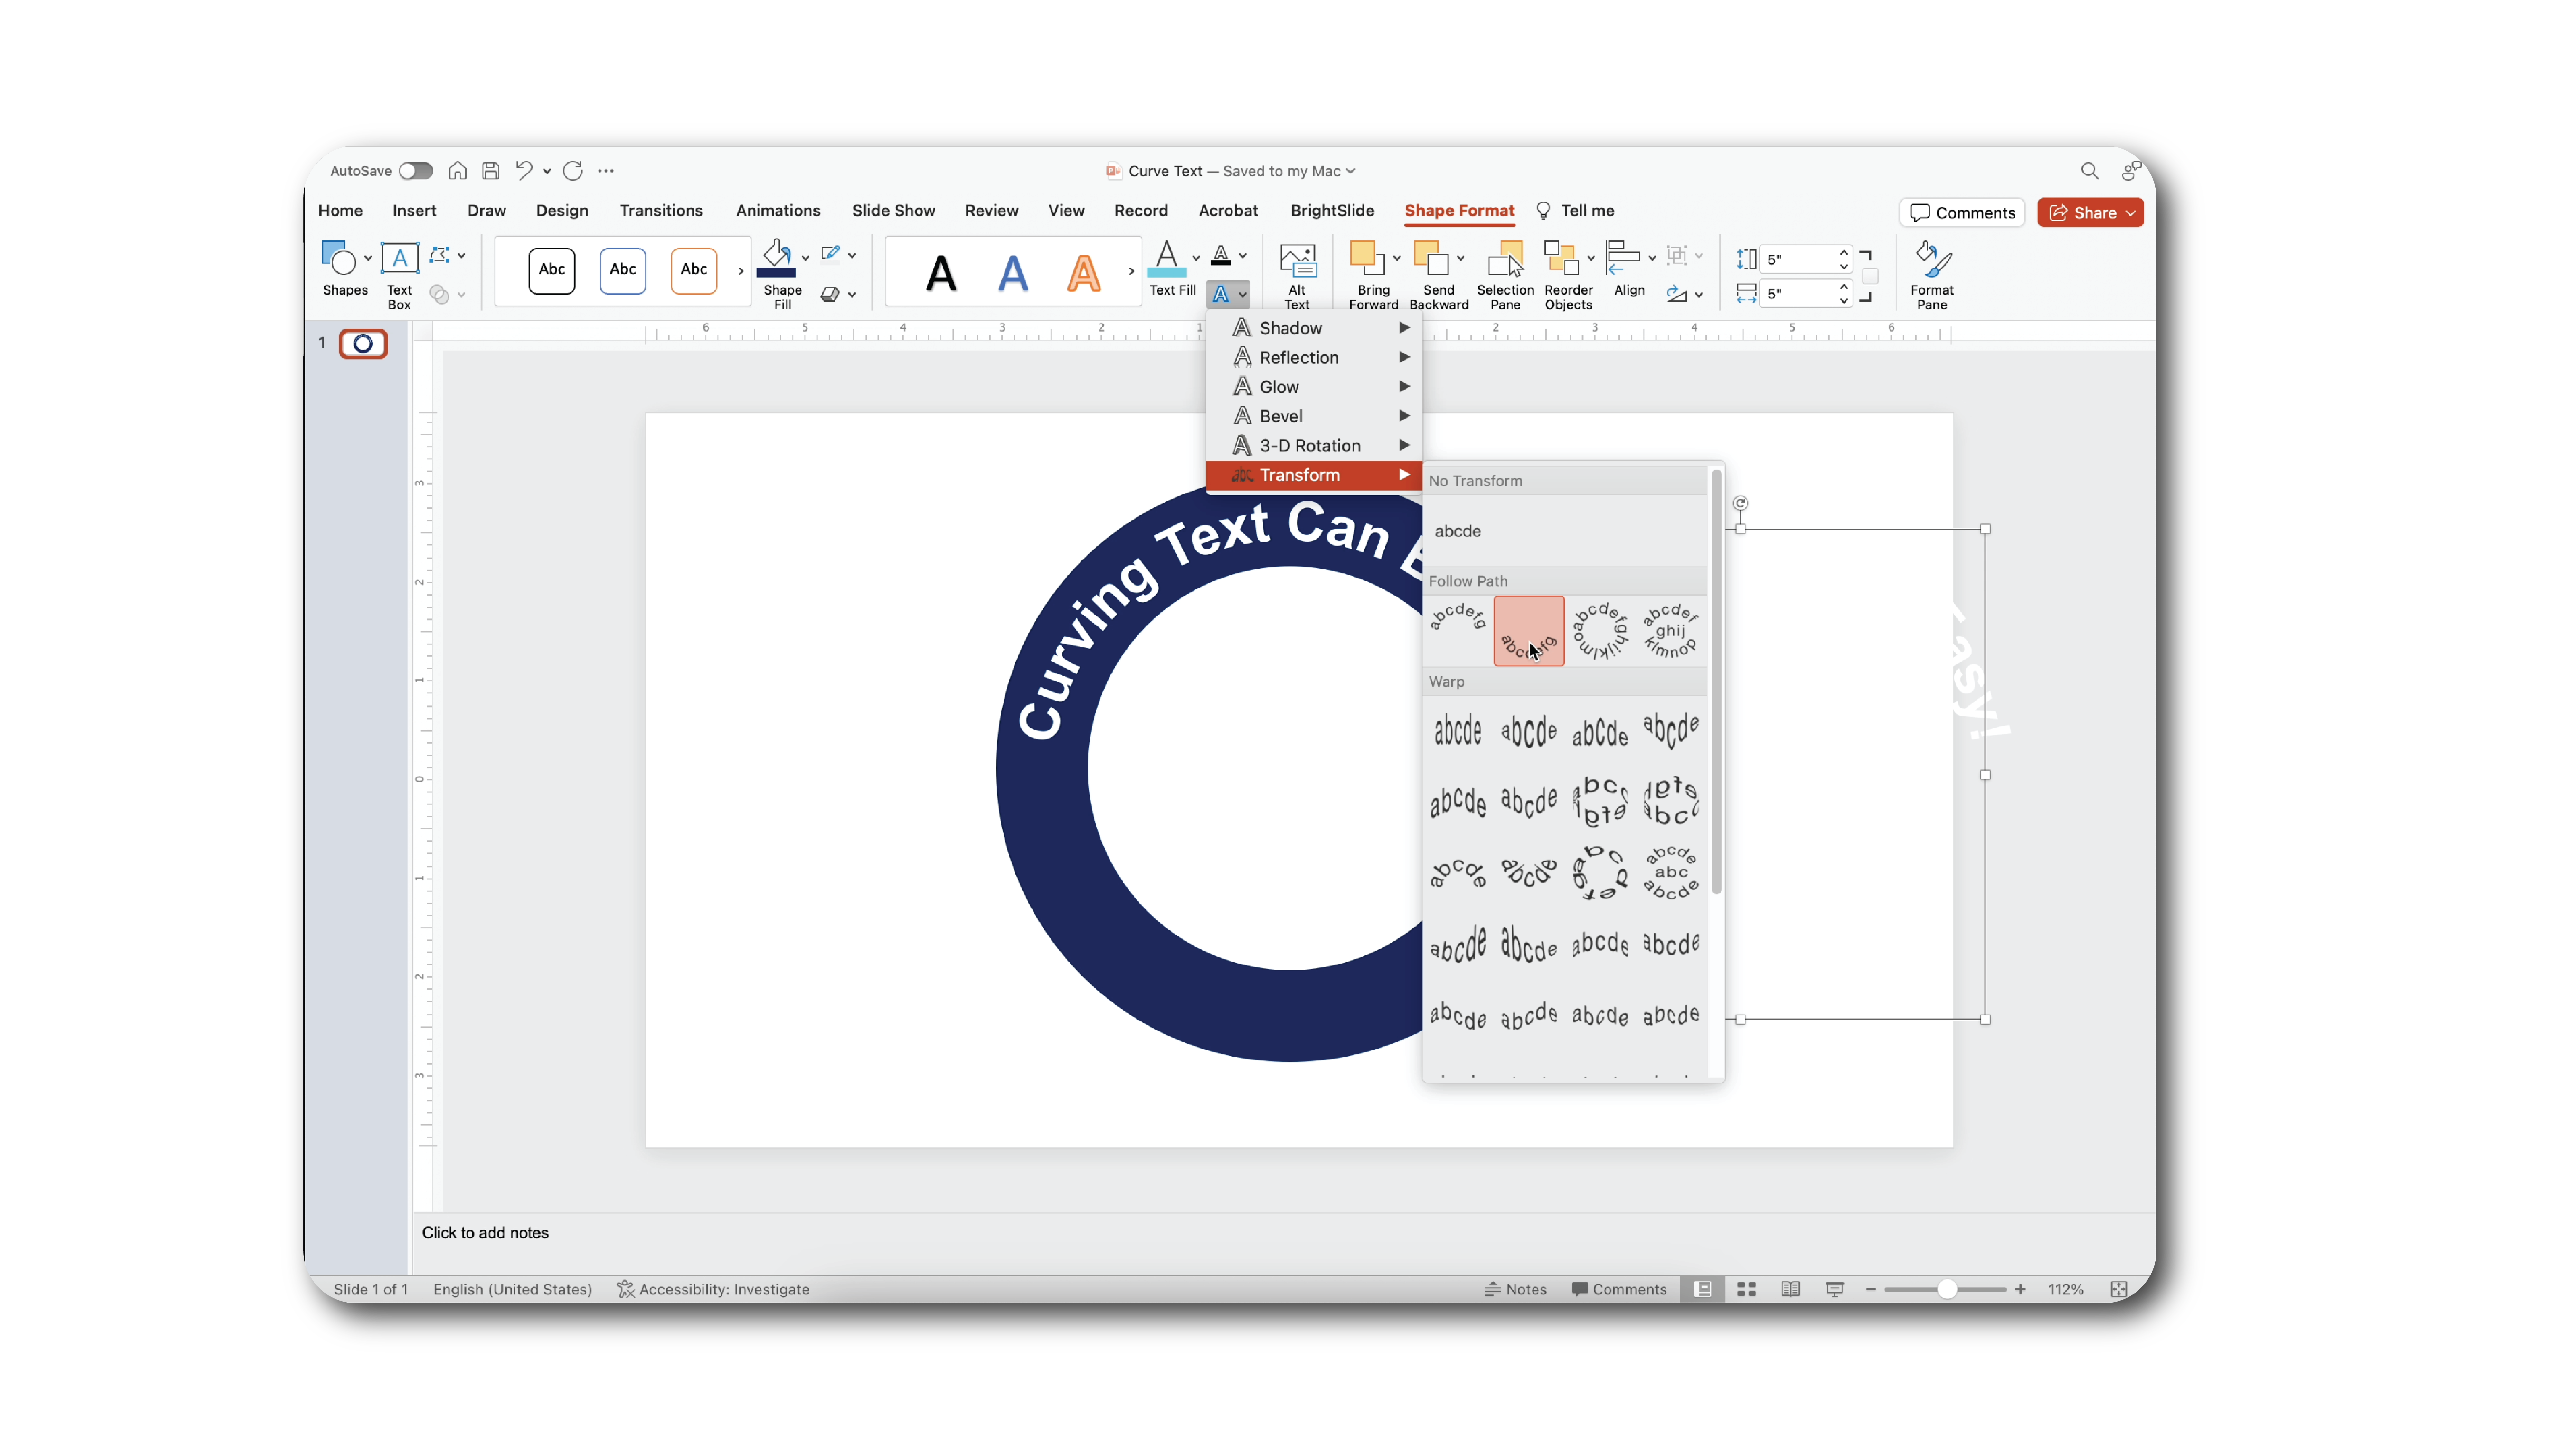
- With the text selected, to Shape Format> Text Effect and scroll down to the Transform option which will bring up another drop-down with more options to choose from. Click Follow Path and choose one of the curve options there.
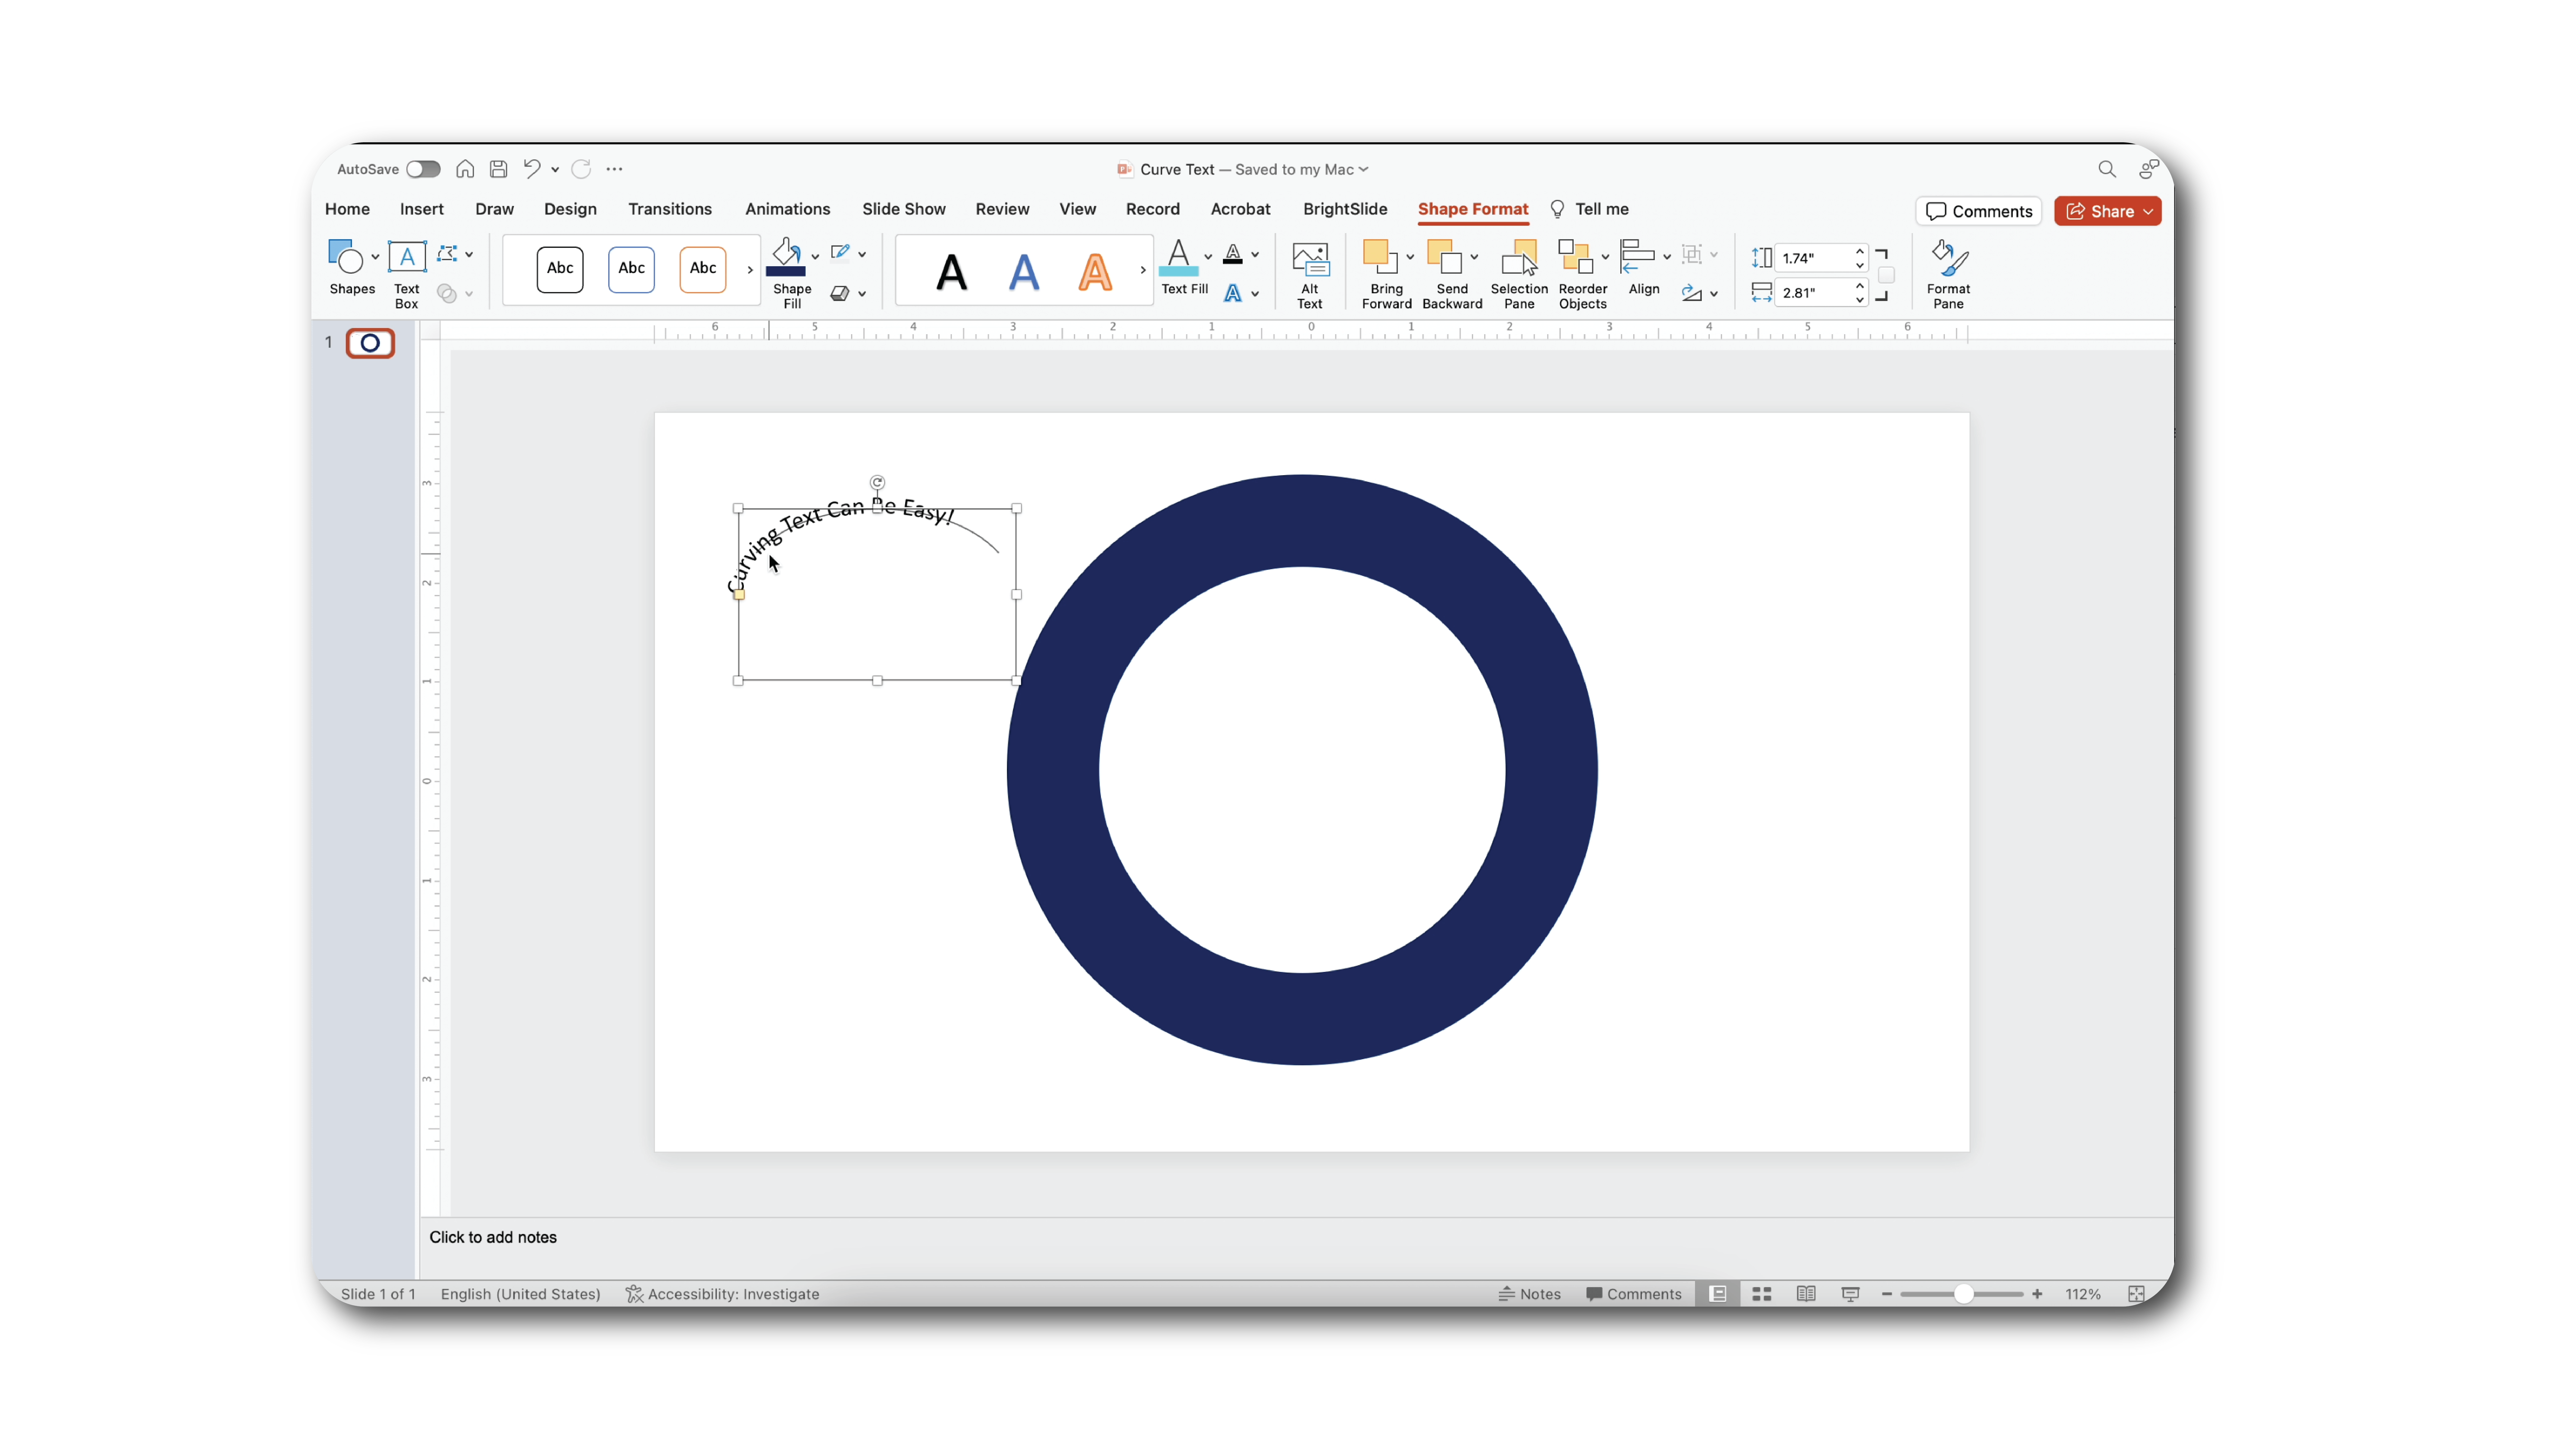
- The size and shape of the path may be exactly what you are looking for. You can adjust the position and size of the path by pulling the yellow dot and adjusting text bounding box.
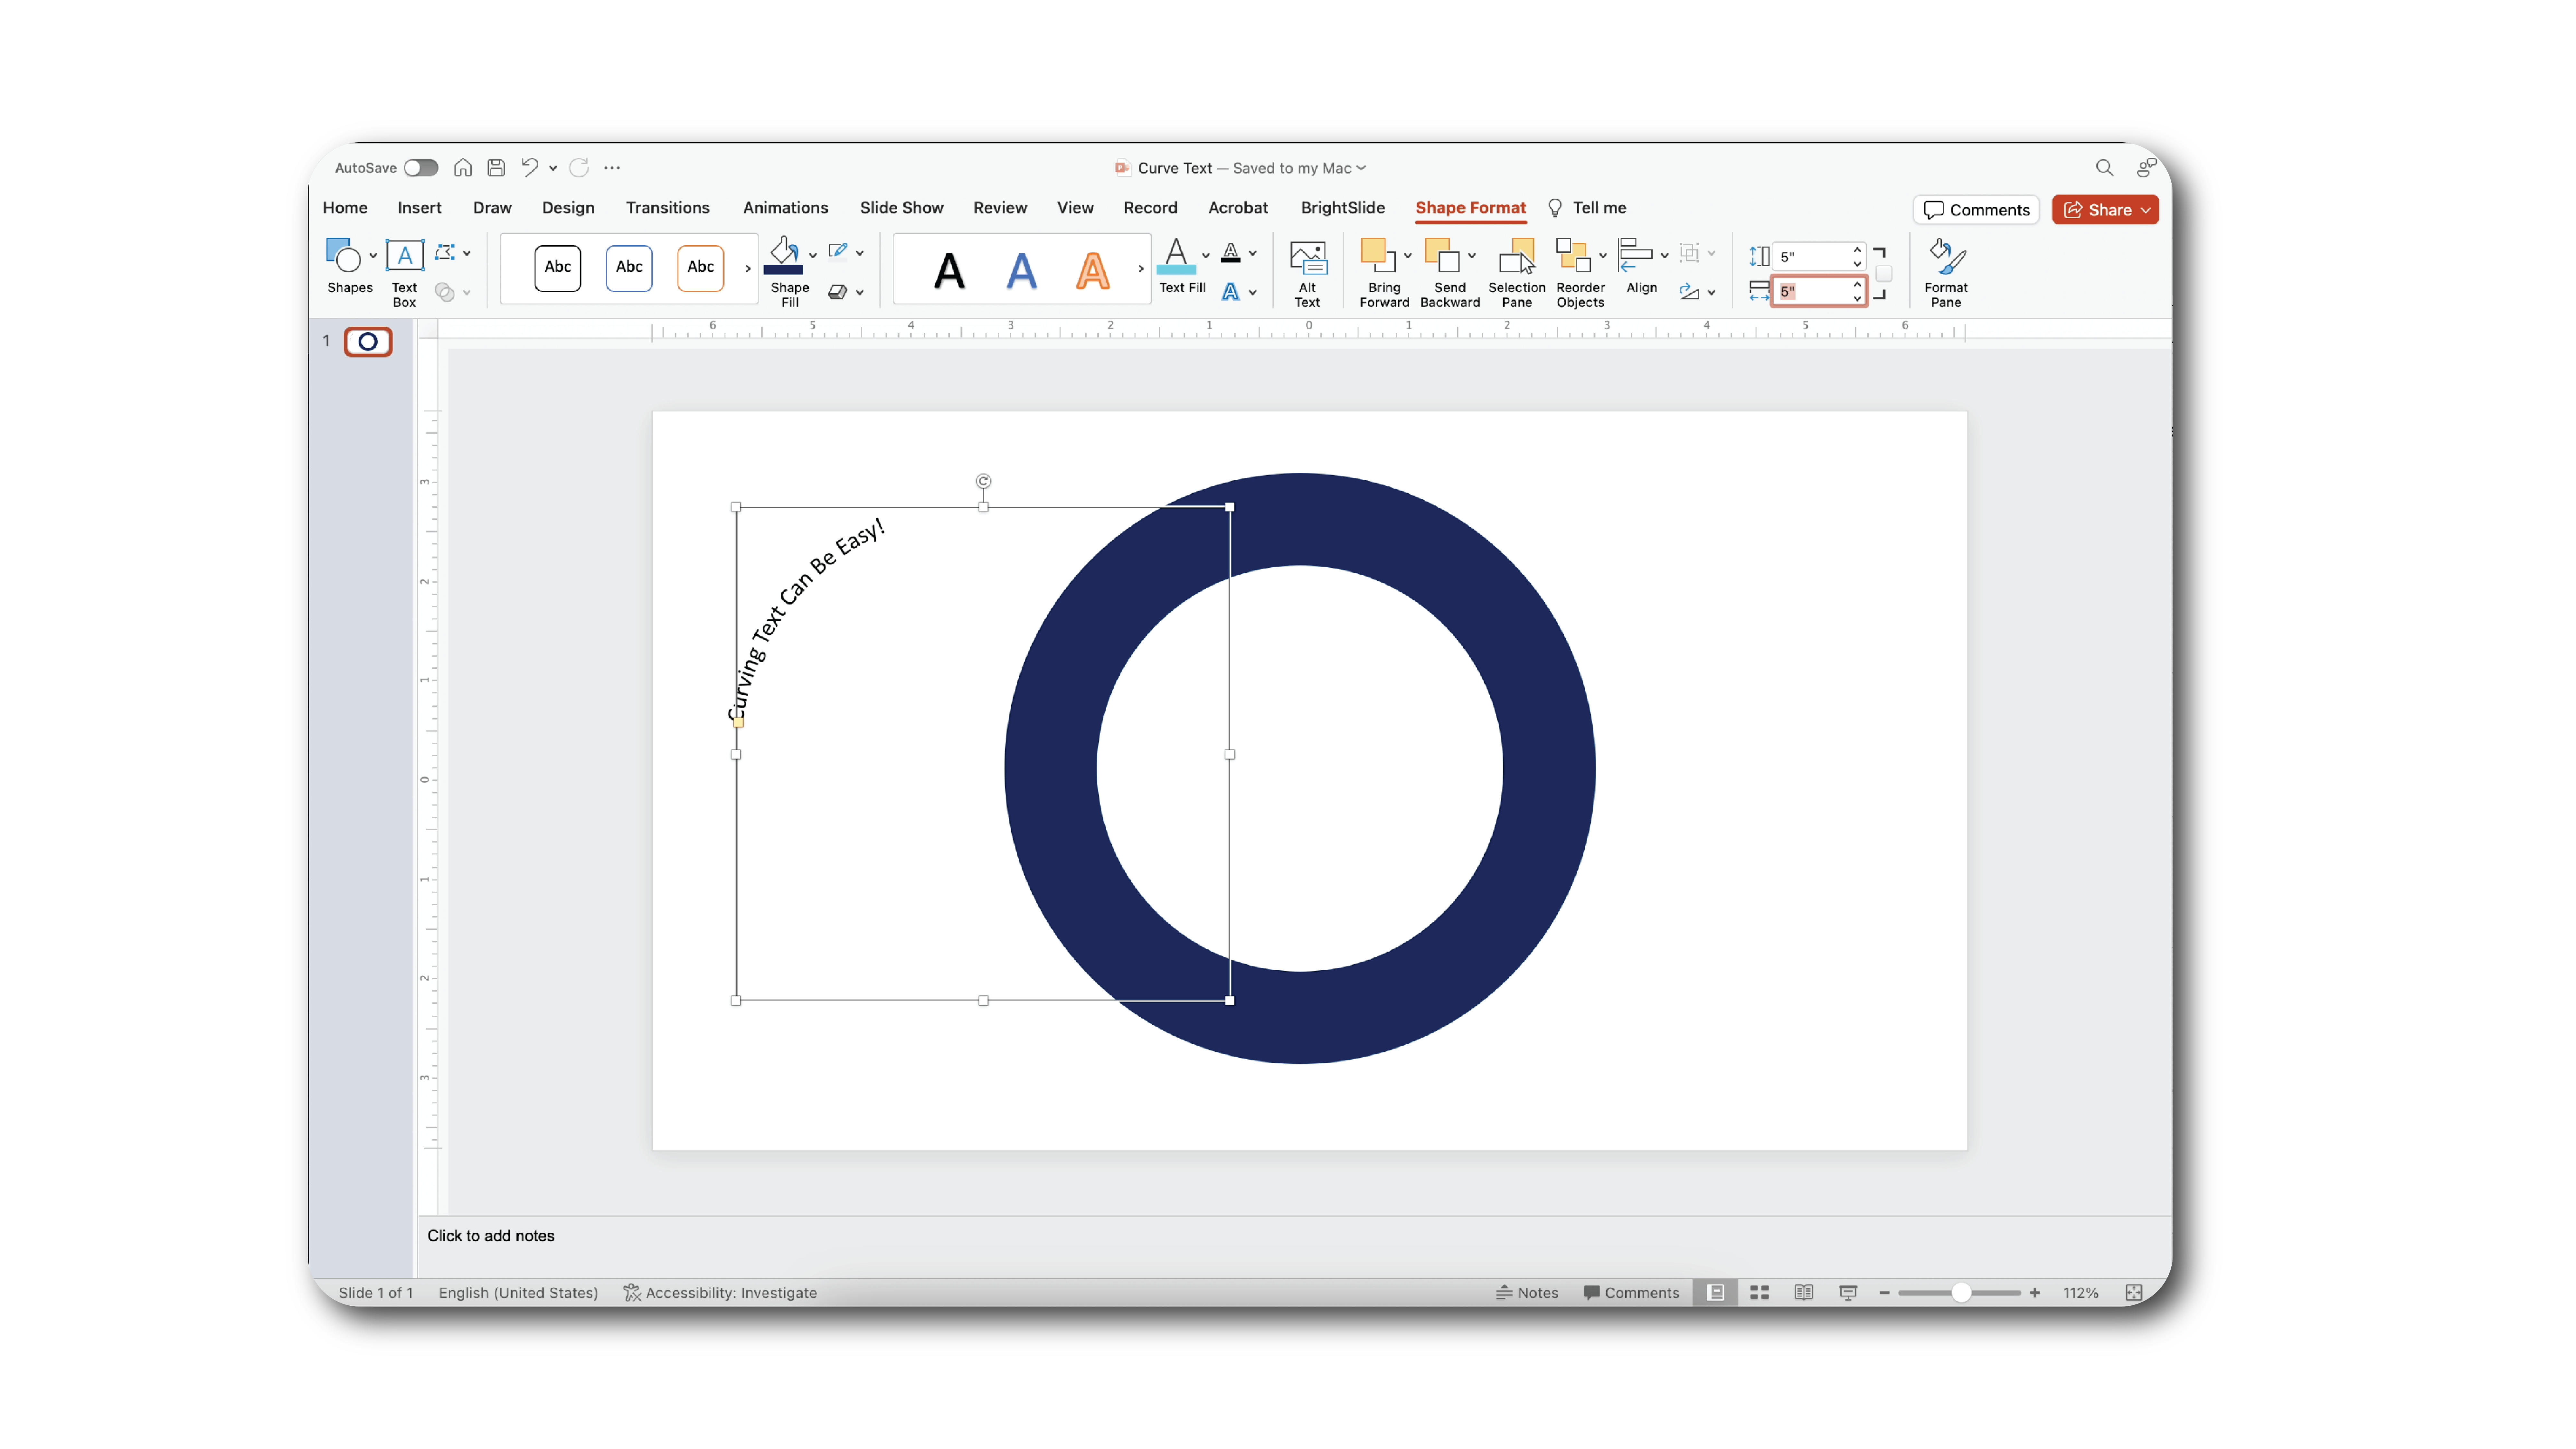
- If you want to make your text path a perfect 1:1 ratio, exact dimensions can be input under the Shape Format.
- Now adjust to the correct font, size, and shape
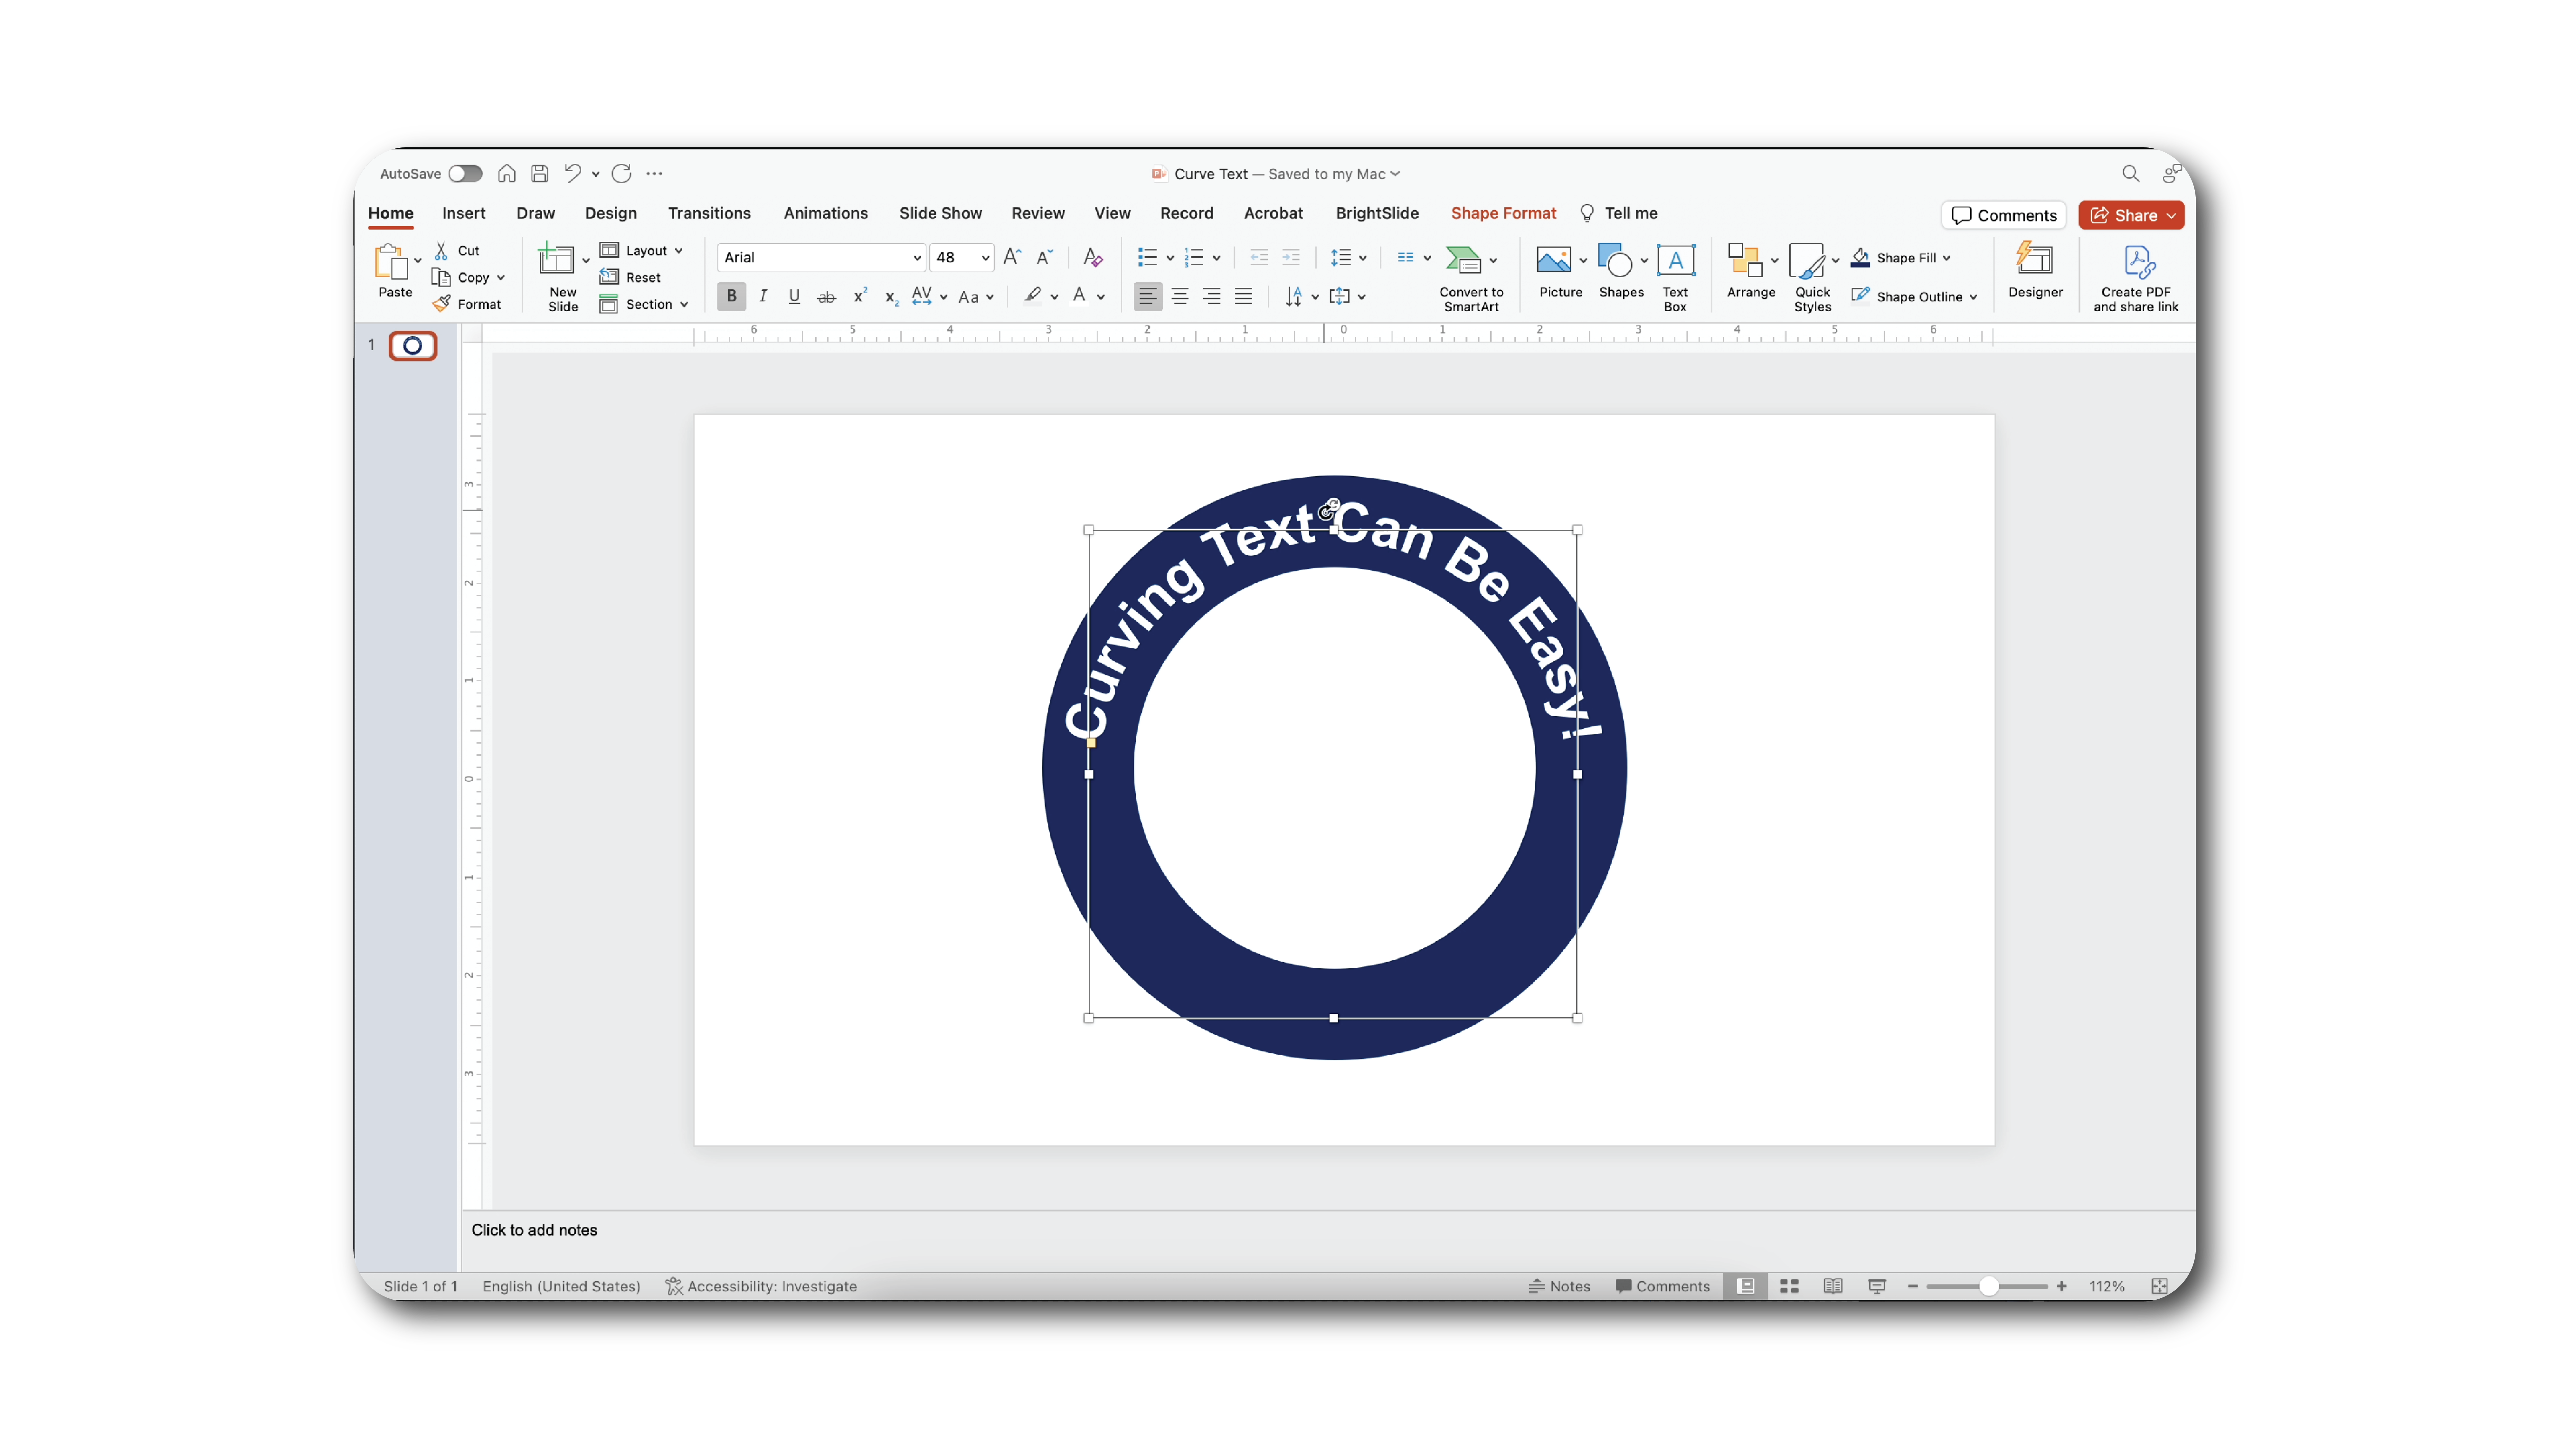
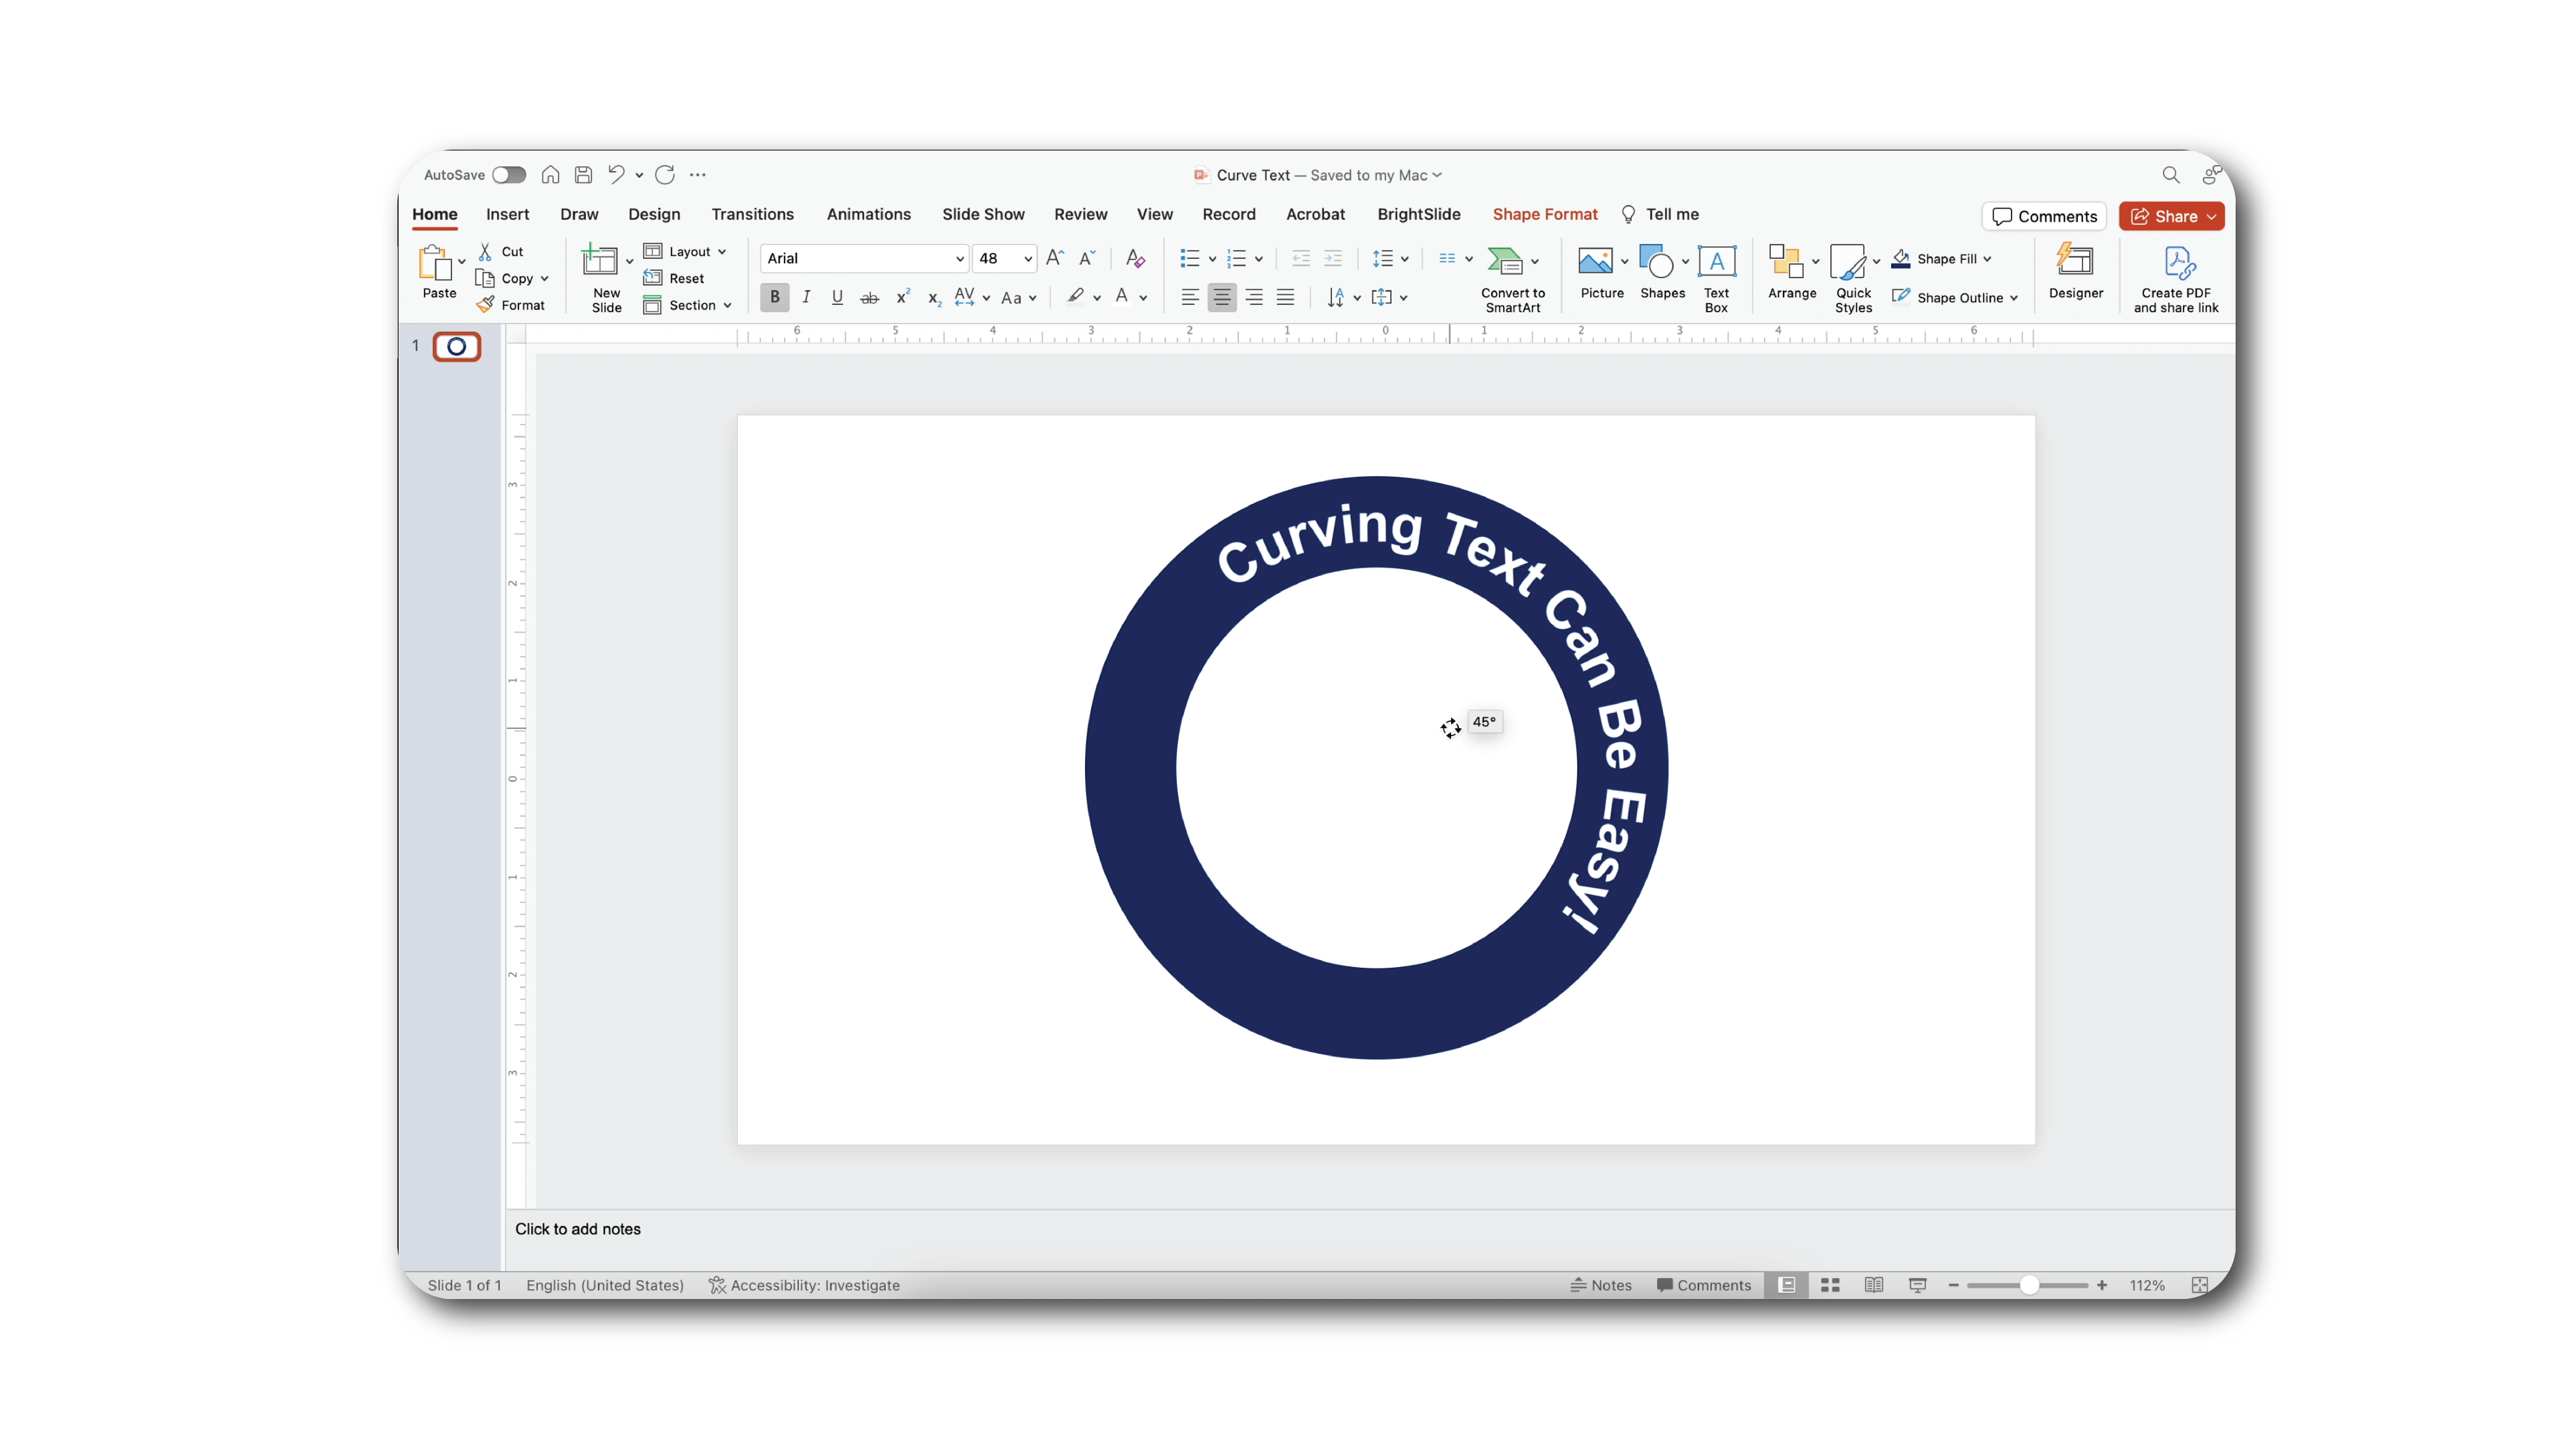
- You can continue to adjust positioning by using the rotate or alignment tools
- If you wish to try a different curved shape, you can always adjust by going back to the text effect selection menu. Here we duplicated our text box and created a bottom curved path.
- Finished product
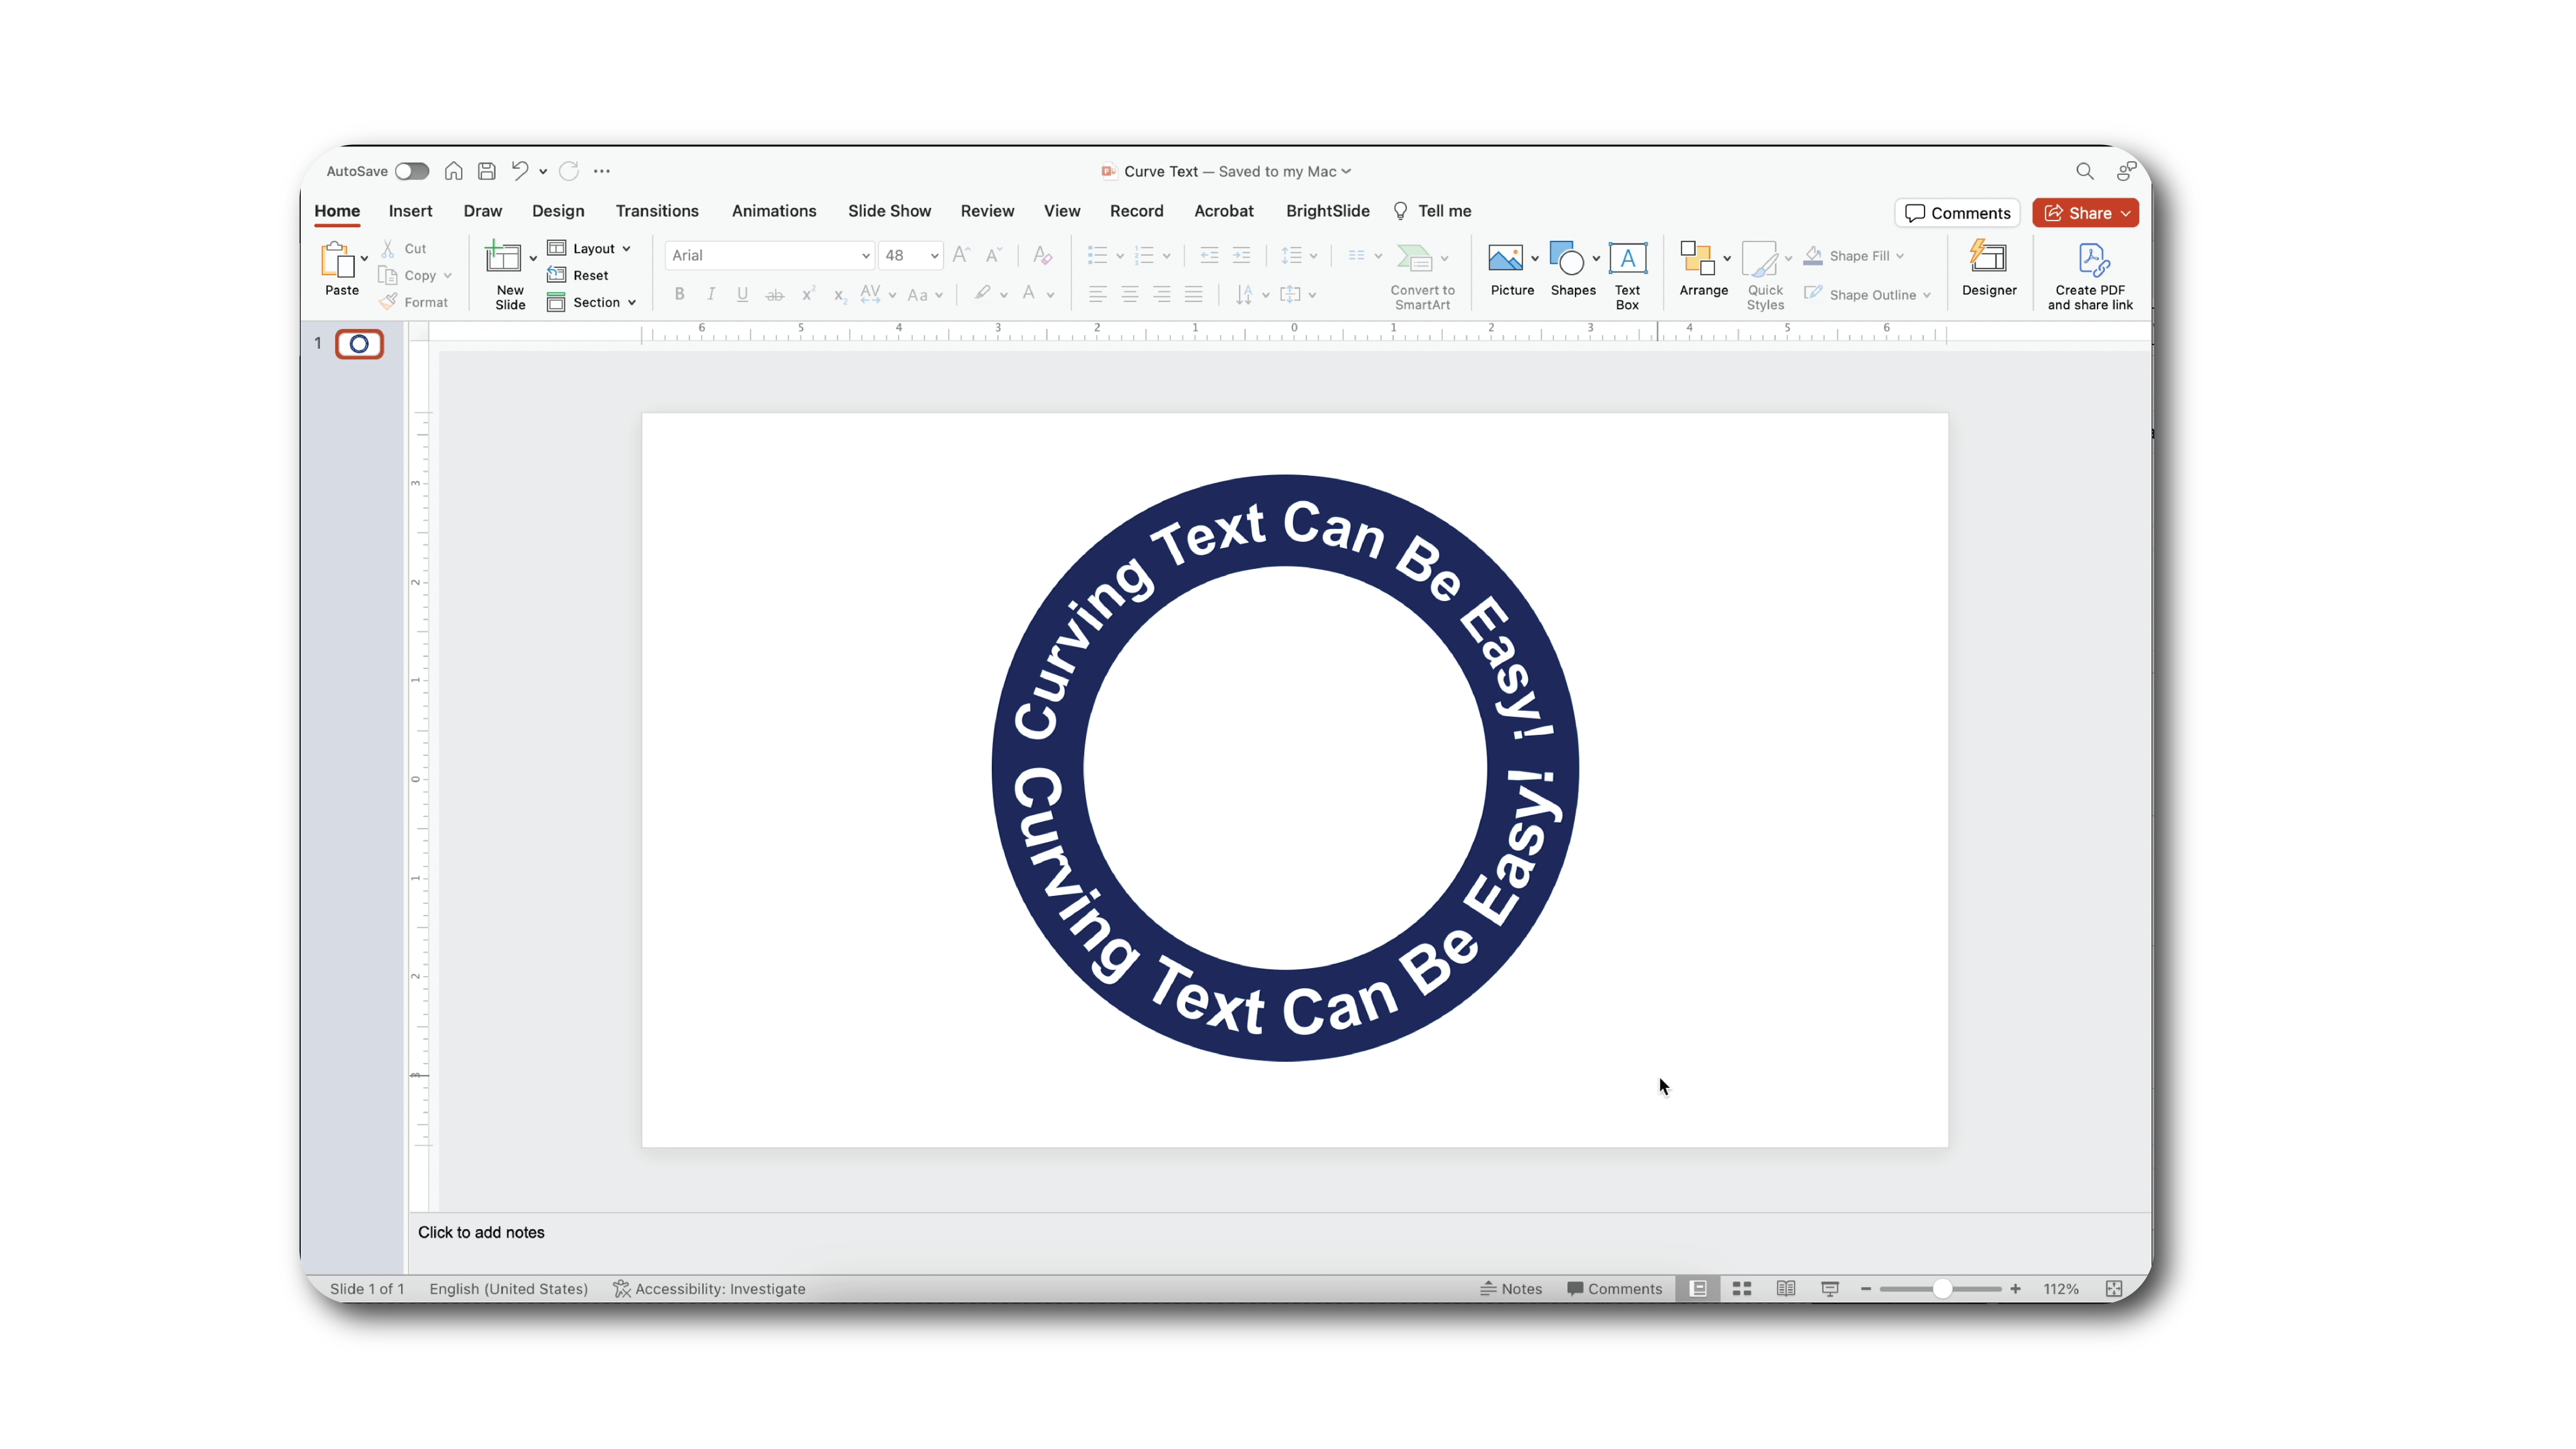
Viola! You’ve done it. Mastered the skill of curving text on PowerPoint. If you’re interested in more PowerPoint tutorials check out this great one from the vault!
And if you’re feeling at your limit and would like to have the pros build your next deck, reach out today! We’d love to help.